Categories
Manuals

c300 manual

Welcome! This manual assists new owners in understanding and maximizing their 2011 Mercedes-Benz C300, offering a detailed guide to features and operation.

This guide provides step-by-step instructions for installation, operation, and maintenance, ensuring a seamless ownership experience with your new vehicle.

Explore the comprehensive overview, designed to help you confidently navigate and enjoy all the capabilities of your sophisticated Mercedes-Benz C300.

Overview of the C300 Model

The 2011 Mercedes-Benz C300 represents a compelling blend of luxury, performance, and advanced technology within the compact executive car segment. This model year delivers a refined driving experience, characterized by its responsive handling and comfortable interior. It’s designed for drivers who appreciate German engineering and a touch of sophistication in their daily commute.

This manual serves as your comprehensive resource for understanding the C300’s capabilities. From its powerful engine to its array of safety features, we’ll cover everything you need to know; Whether you’re a first-time Mercedes-Benz owner or a seasoned enthusiast, this guide will empower you to fully utilize and enjoy your vehicle. Expect detailed explanations and practical advice throughout.

We aim to provide a clear and concise understanding of the C300’s operation and maintenance, ensuring years of reliable performance and driving pleasure.

Target Audience for this Manual

This manual is specifically tailored for all owners and operators of a 2011 Mercedes-Benz C300. It’s designed to be accessible to individuals with varying levels of automotive knowledge, from those new to the Mercedes-Benz brand to experienced car enthusiasts. We assume no prior mechanical expertise, providing clear, step-by-step instructions for all procedures.

Whether you’re a daily commuter, a weekend driver, or simply seeking a deeper understanding of your vehicle’s features, this guide will prove invaluable. It’s also beneficial for anyone responsible for the vehicle’s maintenance, including family members or designated service personnel.

Our goal is to empower every user with the knowledge to safely and effectively operate and care for their C300.

Vehicle Key Features & Specifications

Discover the C300’s strengths! This section details engine performance, interior comforts, exterior dimensions, and crucial specifications for optimal driving and understanding.

Engine and Performance Specifications

Power and Efficiency Combined: The 2011 Mercedes-Benz C300 boasts a robust 3.0-liter V6 engine, delivering a compelling blend of performance and fuel efficiency. This powerplant generates 228 horsepower at 6,000 rpm and 221 lb-ft of torque, providing responsive acceleration and confident highway cruising.

Performance Metrics: Expect a 0-60 mph time of approximately 6.2 seconds, showcasing the C300’s dynamic capabilities. The engine utilizes multi-spark ignition and variable valve timing to optimize combustion and maximize power output. Fuel economy is estimated at 18 mpg city and 28 mpg highway, offering a balance between performance and practicality. This engine is designed for smooth, refined operation, characteristic of the Mercedes-Benz brand.

Key Engine Details: The V6 engine features a lightweight aluminum block and cylinder heads, contributing to overall vehicle efficiency.

Transmission System Details

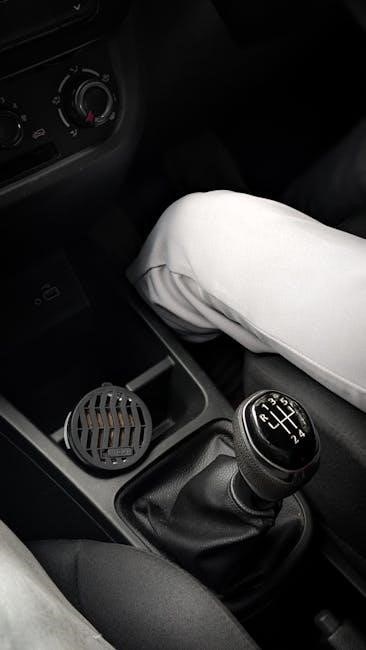
Smooth and Responsive Shifting: The 2011 Mercedes-Benz C300 is equipped with a sophisticated 7G-TRONIC seven-speed automatic transmission, renowned for its smooth and precise gear changes. This transmission enhances both driving comfort and performance, adapting to various driving conditions seamlessly.

Gear Ratios and Control: The 7G-TRONIC utilizes a torque converter for smooth launches and efficient power delivery. Drivers can choose between comfort and sport modes, altering shift points for a more engaging or relaxed driving experience. Manual shift capability is also available via the steering wheel-mounted paddle shifters or the gear selector.

Transmission Technology: The transmission incorporates adaptive learning, adjusting shift patterns based on individual driving styles for optimized performance.

Interior Features and Comfort

Luxurious Cabin Design: The 2011 C300’s interior prioritizes comfort and sophistication. High-quality materials, including wood trim and premium upholstery, create a refined atmosphere. Ergonomically designed seats provide excellent support for both driver and passengers, even on long journeys.

Convenience and Technology: Features include dual-zone automatic climate control, a premium audio system, and power-adjustable front seats. The multi-function steering wheel provides easy access to audio controls, cruise control, and other vehicle functions.

Spacious and Practical: Despite its compact size, the C300 offers a surprisingly spacious interior with ample legroom and headroom.

Exterior Design and Dimensions

Elegant Aesthetics: The 2011 Mercedes-Benz C300 boasts a sleek and sophisticated exterior design, characterized by its classic Mercedes-Benz styling cues. The sculpted body lines and prominent grille contribute to its dynamic and sporty appearance.

Compact Dimensions: The C300’s dimensions are well-suited for urban driving and maneuverability. It measures approximately 178.3 inches in length, 68.0 inches in width, and 56;7 inches in height.

Aerodynamic Efficiency: The vehicle’s aerodynamic design enhances fuel efficiency and reduces wind noise, contributing to a more comfortable driving experience. Alloy wheels and chrome accents further enhance its visual appeal.

Operating Instructions

Mastering Your C300: This section details essential procedures for operating your 2011 Mercedes-Benz C300, ensuring a safe and enjoyable driving experience.

Starting and Stopping the Engine

Starting Procedure: Ensure the vehicle is in Park (P) or Neutral (N), and firmly depress the brake pedal. Insert the key into the ignition or, if equipped, press the start/stop button while applying the brakes. The engine will initiate, and the dashboard indicators will illuminate. Allow a brief moment for oil pressure to build before driving.

Stopping Procedure: Gently apply the brakes to decelerate smoothly. Shift the gear selector to Park (P) and engage the parking brake. Once fully stopped, release the brake pedal. For vehicles with Keyless-Go, simply press the start/stop button again to shut down the engine. Always ensure the vehicle is completely stationary before switching off the ignition.

Important Note: Avoid prolonged idling, as it can impact fuel efficiency and potentially lead to engine wear. Refer to the full owner’s manual for detailed instructions and safety precautions.

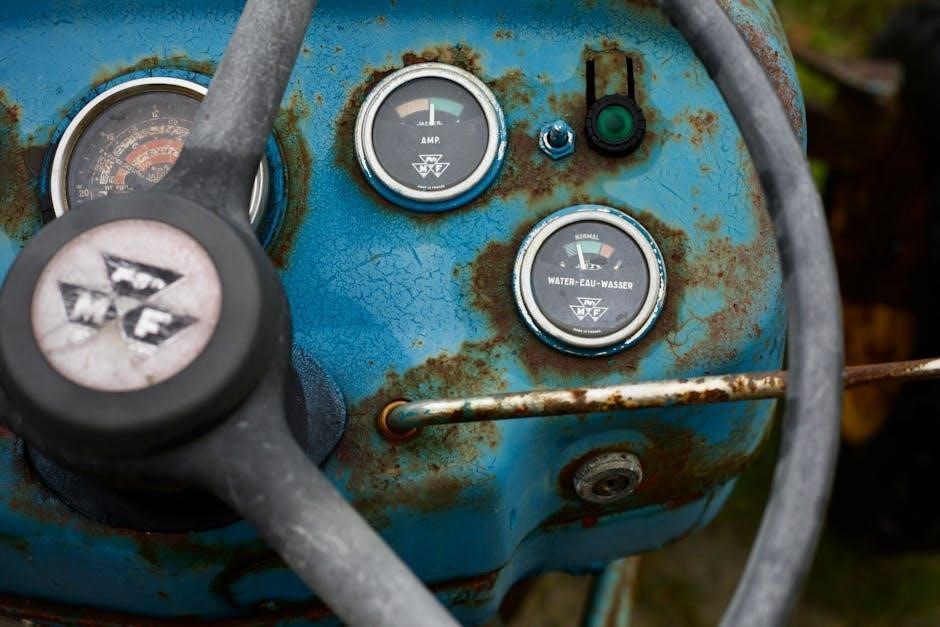
Understanding the Dashboard Indicators

Illuminated Icons: The dashboard features a series of warning lights and indicators. Solid icons generally signify a system is actively engaged, while flashing icons often indicate a potential issue requiring attention. Familiarize yourself with each symbol’s meaning to promptly address any concerns.

Critical Warnings: Red indicators, such as the brake warning or oil pressure light, demand immediate action. Consult the owner’s manual or a qualified technician to diagnose and resolve the problem. Yellow or amber lights typically signal a less urgent, but still important, maintenance need.

System Status: Green and blue indicators display the status of various systems, like cruise control or high beams. Regularly check the dashboard during operation to ensure all systems are functioning correctly.

Using the Multi-Function Steering Wheel

Control at Your Fingertips: The multi-function steering wheel allows convenient control of various vehicle functions without removing your hands from the wheel. Buttons and controls are intuitively placed for ease of use while driving.

Audio & Phone: Utilize the steering wheel controls to adjust audio volume, change tracks, answer phone calls, and navigate menus within the infotainment system. These features enhance driver focus and safety;

Trip Information: Access trip data, such as mileage and fuel consumption, via dedicated buttons on the steering wheel. Explore the settings to customize the displayed information to your preferences.

Operating the Climate Control System

Comfortable Cabin Control: The Mercedes-Benz C300’s climate control system ensures a comfortable cabin environment for both driver and passengers. Adjust temperature, fan speed, and air distribution with intuitive controls.

Dual-Zone Functionality: Enjoy personalized comfort with the dual-zone climate control, allowing independent temperature settings for the driver and front passenger. This feature optimizes individual preferences.

Air Recirculation & Ventilation: Utilize the air recirculation mode to filter outside air, ideal for congested areas. Engage the ventilation system to introduce fresh air into the cabin, enhancing air quality.

Safety Features & Systems

Prioritizing Protection: Your C300 incorporates advanced safety technologies, including airbags, ABS, ESP, and TPMS, designed to protect you and your passengers.

Airbag System Information

Crucial Safety Component: The 2011 Mercedes-Benz C300 is equipped with a sophisticated airbag system, designed to provide crucial protection during a collision. This system includes front, side, and curtain airbags strategically positioned throughout the vehicle’s cabin.

Deployment & Precautions: Airbags deploy rapidly and with significant force. Always ensure occupants are properly seated and wearing seatbelts for optimal protection. Never place objects between occupants and the airbags.

System Indicators: The airbag system continuously monitors its functionality. A warning light on the dashboard indicates potential system issues; immediate inspection by a qualified technician is required if illuminated. Tampering with the airbag system can compromise its effectiveness and is strictly prohibited. Proper maintenance ensures reliable operation during critical moments.

Anti-lock Braking System (ABS)

Enhanced Braking Control: Your 2011 Mercedes-Benz C300 features an Anti-lock Braking System (ABS) designed to maintain steering control during hard braking situations. ABS prevents wheel lockup, allowing you to steer around obstacles while braking forcefully.

Recognizing ABS Activation: You may feel a pulsating sensation in the brake pedal and hear a clicking noise when ABS is engaged – this is normal operation. Maintain firm and consistent pressure on the brake pedal during ABS activation.

System Indicator & Maintenance: A warning light on the dashboard indicates an ABS malfunction. If illuminated, have the system inspected immediately. Regular brake system maintenance, including fluid checks, is vital for optimal ABS performance and overall safety.

Electronic Stability Program (ESP)

Maintaining Vehicle Control: The Electronic Stability Program (ESP) in your 2011 Mercedes-Benz C300 is a crucial safety system designed to help prevent skidding and loss of control, particularly during emergency maneuvers or on slippery surfaces.

How ESP Works: ESP selectively applies braking to individual wheels to correct oversteer or understeer, helping the driver maintain the intended course. A flashing ESP indicator light signals the system is actively intervening.

System Limitations & Driver Responsibility: ESP enhances stability but doesn’t eliminate the laws of physics. Always drive responsibly, adjust speed to conditions, and maintain a safe following distance. Regular vehicle maintenance ensures optimal ESP functionality.

Tire Pressure Monitoring System (TPMS)

Ensuring Optimal Tire Health: Your 2011 Mercedes-Benz C300 is equipped with a Tire Pressure Monitoring System (TPMS) to alert you when tire pressure is significantly low, impacting safety and fuel efficiency.

System Operation & Indicators: TPMS continuously monitors tire pressure. A warning light illuminates on the dashboard if pressure drops below recommended levels. Refer to the doorjamb sticker for correct inflation pressures.

Responding to TPMS Alerts: If the light activates, check and inflate tires promptly. Remember that temperature changes affect pressure. Regular checks, even without alerts, are recommended for optimal performance and longevity.

Maintenance & Care

Prolong Vehicle Life: This section details essential maintenance schedules, fluid checks, and simple procedures to keep your 2011 C300 performing optimally.

Scheduled Maintenance Intervals

Maintaining Peak Performance: Your 2011 Mercedes-Benz C300 requires a consistent maintenance schedule to ensure longevity and optimal performance. Adhering to these intervals, detailed in your service booklet, is crucial.

“Service A” and “Service B” are the foundational checkpoints, typically occurring annually or every 10,000 miles (whichever comes first). Service A focuses on oil and filter changes, along with a comprehensive multi-point inspection. Service B includes everything in Service A, plus additional checks and replacements like cabin air filters and brake component inspections.

Beyond these, specific components require attention at designated mileage intervals. These include spark plug replacement, brake fluid changes, coolant flushes, and transmission fluid services. Ignoring these can lead to costly repairs down the line. Refer to the official Mercedes-Benz maintenance schedule for precise timings and recommendations tailored to your driving conditions.

Fluid Level Checks and Top-Ups

Essential for Operation: Regularly checking and maintaining proper fluid levels is vital for your 2011 Mercedes-Benz C300’s health. Low fluid levels can cause significant damage. Engine oil should be checked weekly using the dipstick, adding the correct grade as needed.

Coolant levels, visible in the expansion tank, should be between the minimum and maximum marks when the engine is cold. Brake fluid and power steering fluid levels are also critical; consult your owner’s manual for specific reservoir locations and recommended fluid types.

Windshield washer fluid is essential for visibility. Top up as needed. Always use fluids meeting Mercedes-Benz specifications to avoid compatibility issues and ensure optimal system performance. Ignoring fluid levels can lead to costly repairs.

Replacing Windshield Wipers

Maintaining Visibility: Replacing worn windshield wipers is crucial for clear visibility, especially during inclement weather. Locate the release tab on the wiper arm and lift the arm away from the windshield. Gently slide the old wiper blade down and off the mounting hook.

Install the new wiper blade by sliding it onto the hook until it clicks securely into place. Lower the wiper arm back onto the windshield. Repeat for the other wiper blade.

Ensure the blades are firmly attached and sweep smoothly across the glass. Regularly inspect wiper blades for cracks or wear, replacing them every 6-12 months for optimal performance and safety.

Battery Maintenance and Replacement

Prolonging Battery Life: Regularly inspect the battery terminals for corrosion; clean with a baking soda and water solution if necessary. Ensure the battery is securely mounted to prevent movement. Avoid leaving lights or accessories on when the engine is off, as this can drain the battery.

Replacement Procedure: Disconnect the negative terminal first, then the positive. Remove the battery hold-down clamp. Lift the old battery out carefully. Install the new battery, connect the positive terminal first, then the negative; Secure the hold-down clamp.

Proper disposal of the old battery is essential; recycle at an authorized facility.

Troubleshooting Common Issues

Quick solutions for engine, warning lights, and electrical problems are detailed here, helping you address minor issues and maintain optimal C300 performance.

Addressing Engine Starting Problems

If your C300 fails to start, first check the battery connections, ensuring they are clean and tight. A weak battery is a common culprit, especially in cold weather; consider a jump start.

Verify sufficient fuel levels and listen for the fuel pump priming sound upon turning the key. If no sound is heard, a fuel pump issue may exist.

Inspect the starter motor; clicking sounds often indicate a failing starter. Also, examine the ignition system – faulty spark plugs or ignition coils can prevent starting.

Consult a qualified mechanic if these basic checks don’t resolve the issue, as more complex problems like a faulty crankshaft position sensor may be present.

Dealing with Warning Light Illumination

When a warning light illuminates on your C300’s dashboard, don’t panic, but address it promptly. Refer to the vehicle’s information display or this manual to identify the specific light’s meaning.

A solid light generally indicates a monitored system is experiencing a fault, while a flashing light often signifies a more urgent issue requiring immediate attention.

Common lights include the check engine light (potential engine issues), ABS light (braking system problem), and tire pressure warning (low tire pressure).

Ignoring warning lights can lead to more significant damage; if unsure, consult a qualified Mercedes-Benz technician for diagnosis and repair.

Resolving Electrical System Issues

Electrical problems in your C300 can range from minor inconveniences to serious malfunctions. Begin by checking the vehicle’s battery connections, ensuring they are clean and tight.

Fuses play a crucial role; locate the fuse box (usually under the dashboard or in the engine compartment) and inspect any blown fuses related to the affected system.

If lights aren’t working, or power windows fail, a fuse replacement might resolve the issue. For more complex problems, like a completely dead battery or malfunctioning infotainment system, professional diagnosis is recommended.

Avoid attempting repairs beyond your skill level; improper handling can cause further damage or safety hazards.

Technical Specifications in Detail

Dive deep! This section presents exhaustive data on the C300’s engine, transmission, and suspension, offering precise details for informed understanding.

Detailed Engine Specifications

Engine Type: The 2011 Mercedes-Benz C300 is equipped with a 3.0-liter V6 engine, meticulously engineered for a balance of performance and efficiency. This powerplant boasts a robust design, delivering a smooth and responsive driving experience.

Horsepower & Torque: Producing 228 horsepower at 6,000 rpm and 221 lb-ft of torque at 3,500-4,000 rpm, the engine provides ample power for both city commuting and highway cruising.

Fuel System: It utilizes a multi-point fuel injection system, optimizing fuel delivery for enhanced combustion and reduced emissions. The engine’s design prioritizes both power output and environmental responsibility.

Compression Ratio: Featuring a compression ratio of 10.7:1, the engine achieves an optimal balance between power and fuel economy, contributing to a refined driving experience.

Valve Train: The engine incorporates a dual overhead camshaft (DOHC) valve train with four valves per cylinder, maximizing airflow and enhancing overall engine performance.

Transmission Gear Ratios

Transmission Type: The 2011 Mercedes-Benz C300 features a 7G-TRONIC seven-speed automatic transmission, renowned for its smooth shifting and efficiency. This transmission enhances the driving experience by providing optimal gear selection for various driving conditions.

Gear Ratios: First gear ratio is 4.38, second is 2.86, third is 1.98, fourth is 1.30, fifth is 0.95, sixth is 0.74, and reverse is 3.42. Final drive ratio is 3.07.

Shift Points: The transmission’s intelligent shift programming adapts to the driver’s style and road conditions, ensuring optimal performance and fuel economy. It offers both automatic and manual shift modes.

Operation: Drivers can seamlessly switch between driving modes, allowing for a customized experience. The transmission contributes significantly to the C300’s refined and responsive handling characteristics.

Suspension System Components

Front Suspension: The 2011 Mercedes-Benz C300 utilizes a three-link front suspension with coil springs and gas-filled shock absorbers, providing a comfortable yet controlled ride. This design minimizes body roll and maximizes tire contact with the road.

Rear Suspension: The rear suspension features a multi-link independent setup, also with coil springs and gas-filled shocks. This configuration enhances stability and handling, particularly during cornering and over uneven surfaces.

Key Components: Includes control arms, stabilizer bars, wheel hubs, and high-performance bushings. These components work in harmony to deliver a refined driving experience.

Design Focus: The suspension system is engineered for both comfort and sporty handling, offering a balance suitable for daily driving and spirited performance.

Warranty Information

Coverage details are outlined within, specifying terms, durations, and what’s protected. Claim procedures are clearly explained for a streamlined service experience.

Coverage Details

The Mercedes-Benz C300 (2011) new vehicle limited warranty offers comprehensive protection for a specified period. This includes coverage for defects in materials or workmanship under normal use.

Basic warranty coverage typically extends for 4 years or 50,000 miles, whichever comes first, covering a wide range of components. Powertrain warranty often extends longer, potentially to 6 years or 70,000 miles, focusing on engine, transmission, and drive systems.

Specific exclusions apply, such as wear-and-tear items like brake pads and tires. Corrosion protection is also included, varying in duration. Review the full warranty booklet for precise terms and conditions. Maintaining proper vehicle service is crucial for warranty validity.

Transferability of the warranty may be subject to specific requirements.

Claim Procedures

To initiate a warranty claim for your 2011 Mercedes-Benz C300, first contact an authorized Mercedes-Benz dealership. Schedule a service appointment, clearly explaining the issue and referencing your warranty.

The dealership’s service advisor will diagnose the problem and determine if it’s covered under warranty. Documentation is key; retain all repair orders and related paperwork. The dealership will submit the claim to Mercedes-Benz USA on your behalf.

Claim approval depends on warranty terms and diagnostic findings. You may be responsible for a deductible, if applicable. Keep records of all communication with the dealership and Mercedes-Benz. For further assistance, consult the warranty booklet or contact Mercedes-Benz customer service.

Categories
Manuals

green egg user manual

Big Green Egg User Manual: A Comprehensive Guide

Welcome! This manual provides essential guidance for optimal Big Green Egg performance, covering setup, operation, maintenance, troubleshooting, and advanced cooking techniques for enthusiasts.

The Big Green Egg (EGG) represents a revolutionary cooking experience, blending ancient techniques with modern ceramic technology. More than just a grill, it’s a versatile outdoor kitchen capable of grilling, smoking, baking, and roasting. This comprehensive guide will empower you to unlock the EGG’s full potential. Understanding its unique design – the ceramic construction, precise airflow control, and optional convEGGtor – is key to mastering its capabilities.

Proper charcoal management and regular maintenance, including hinge adjustments with WD-40, ensure years of exceptional cooking. Need help? Customer support resources are readily available.

Understanding the Components

The Big Green Egg comprises several key elements working in harmony. The ceramic Egg itself provides superior heat retention and insulation. The convEGGtor, placed above the charcoal, facilitates indirect cooking and smoking. Precise temperature control relies on the draft door at the base and the top vent, regulating airflow.

A properly filled firebowl with lump charcoal is crucial for successful operation. Maintaining moving parts, like the hinge, with silicon spray ensures smooth lid operation. Familiarizing yourself with these components is vital for optimal performance.

The Egg Itself: Materials and Construction

The Big Green Egg’s core is crafted from high-fired ceramic, chosen for its exceptional heat retention and durability. This material allows for consistent temperatures and efficient charcoal usage. The ceramic shell’s thickness contributes to superior insulation, minimizing temperature fluctuations.

The Egg’s robust construction ensures longevity, withstanding extreme temperatures and outdoor conditions. Its unique shape promotes natural convection, distributing heat evenly. Understanding the ceramic’s properties is key to maximizing your cooking experience and achieving optimal results.

ConvEGGtor: Purpose and Placement

The ConvEGGtor is a crucial component, transforming your Big Green Egg into a versatile cooking system; It functions as a heat deflector, enabling indirect cooking methods like roasting and smoking. Proper placement is vital; position it leg-side up for deflecting heat, and leg-side down for open-grill direct cooking.

The ConvEGGtor maximizes the Egg’s functionality, allowing for a wider range of culinary possibilities. It also helps to prevent flare-ups and ensures even heat distribution. Experiment with different configurations to master various cooking styles.

Draft Door & Top Vent: Controlling Airflow

Airflow management is paramount for Big Green Egg operation. The draft door at the base and the top vent work in tandem to regulate temperature; Opening both increases airflow, raising the temperature, while closing them reduces it. Precise adjustments are key to maintaining desired cooking temperatures.

Oxygen is crucial; insufficient airflow is a common issue. Experiment with small adjustments to both vents to find the sweet spot for your desired cook. Remember, controlling airflow is the foundation of successful Big Green Egg cooking.

Getting Started: First-Time Use

Initial setup is straightforward. Begin by filling half of your Big Green Egg firebowl with fresh lump charcoal – avoid briquettes for optimal results. Light the charcoal, allowing it to fully ignite before proceeding. Once lit, place the convEGGtor and grill grate securely inside the Egg.

This initial burn-in period seasons the Egg. Achieving stable temperatures requires practice; start with small adjustments to the draft door and top vent. Familiarize yourself with how airflow impacts heat control for successful cooking.

Lighting the Charcoal: Methods and Best Practices

Successfully lighting your Big Green Egg charcoal is crucial. Many users employ electric starters, placing them directly into the lump charcoal. Alternatively, chimney starters work effectively, transferring hot coals into the Egg. Avoid lighter fluids, as they impart unwanted flavors.

Ensure adequate airflow by partially opening the draft door during lighting. If experiencing difficulty, remember oxygen is often the issue – adjust vents accordingly. Allow sufficient time for the charcoal to fully ignite, indicated by a grey ash coating, before cooking.

Achieving Stable Temperatures

Maintaining consistent temperatures is key to successful Big Green Egg cooking. Begin by establishing a target temperature, then carefully adjust the top and draft vents. Smaller adjustments are preferable to large swings. The ConvEGGtor plays a vital role; its position influences heat distribution and stability.

Monitor the temperature using a reliable thermometer. Remember that lid openings cause temperature fluctuations, so minimize them. Sufficient charcoal quantity is also essential; insufficient heat means insufficient smoke and temperature control.

Maintaining Your Big Green Egg

Regular maintenance ensures longevity and peak performance. Utilize quality lump charcoal for optimal results, managing the quantity to suit your cooking needs. Keep moving metal parts, like the hinge and draft door, lubricated with WD-40 or silicon spray to prevent sticking.

Cleaning the grill grate after each use prevents buildup and ensures food safety. Proper charcoal disposal is crucial; allow ashes to cool completely before discarding. Consistent care will maximize your Big Green Egg experience.

Charcoal Management: Types and Quantity

Lump charcoal is highly recommended for the Big Green Egg, providing superior heat and flavor. Begin by filling half of the firebowl with fresh lump charcoal for most cooks. Insufficient charcoal leads to insufficient heat and smoke, impacting cooking results.

Monitor charcoal levels during extended cooks, adding more as needed to maintain stable temperatures. Proper charcoal management is key to achieving consistent cooking performance and maximizing the Egg’s efficiency.

Cleaning and Seasoning the Grill Grate

After each use, allow the grill grate to cool slightly before cleaning. Remove any food residue with a grill brush. Avoid harsh detergents, as they can affect the flavor of future cooks. Regularly seasoning the grate with a high-heat oil, like canola or vegetable oil, prevents sticking and promotes even cooking.

A well-seasoned grate contributes to a better sear and easier food release. Maintaining a clean and seasoned grate ensures optimal performance and longevity of your Big Green Egg.

Troubleshooting Common Issues

Encountering problems with your Big Green Egg is normal. Temperature fluctuations often stem from airflow adjustments – too much or too little ventilation. Difficulty lighting usually indicates insufficient oxygen; ensure vents aren’t overly restricted. Lid issues, like stiffness, frequently require hinge adjustments or lubrication with WD-40 or silicone spray.

Addressing these common concerns promptly ensures a seamless cooking experience. Remember to consult the full manual or Big Green Egg support for more complex issues and detailed solutions.

Temperature Control Problems: Too Hot or Too Cold

If your Big Green Egg runs too hot, partially close the top vent to reduce airflow. Conversely, for lower temperatures, open the vent further. Insufficient charcoal can also cause low temperatures; add more lump charcoal. Remember, oxygen is key – restricted airflow leads to temperature drops.

Stable temperatures require practice and precise vent control. Monitor the thermometer closely and make small adjustments. Consistent charcoal quality also impacts temperature regulation, so use a reliable source.

Difficulty Lighting the Charcoal

If you struggle to light the charcoal, ensure adequate airflow by fully opening both the draft door and top vent initially. Use natural fire starters; avoid lighter fluids. Fill at least half the firebowl with lump charcoal for sufficient mass. If it still won’t ignite, check for damp charcoal – moisture hinders combustion.

Proper lighting requires oxygen. A chimney starter is highly recommended for consistent, even ignition. Allow the charcoal to fully light before adjusting vents for temperature control.

Lid Opening/Closing Issues & Hinge Adjustment

A challenging lid operation often stems from hinge tension. If the lid is difficult to open or close, adjustment is needed. Inspect the hinges for debris or rust, cleaning and lubricating with WD-40 or silicone spray. Tighten or loosen the hinge bolts incrementally to modify tension.

Ensure the Egg is on a level surface; uneven ground impacts lid movement. Regularly maintain moving parts to prevent sticking. Proper adjustment ensures smooth, effortless operation and preserves the Egg’s integrity.

Advanced Techniques

Elevate your cooking with advanced Big Green Egg techniques! Explore the art of smoking, utilizing wood chips or chunks for nuanced flavor profiles. Experiment with the firebowl, adapting it for versatile cooking styles – direct, indirect, and hybrid methods.

Master temperature control for precise results. Utilize the convEGGtor for indirect cooking and heat deflection. Combine wood types for complex smoke rings. These techniques unlock the Egg’s full potential, transforming you into a true kamado master.

Smoking with Wood Chips & Chunks

Enhance your dishes with authentic smoky flavors! Wood chips deliver quick, intense smoke, ideal for shorter cooks, while chunks provide a longer-lasting, more subtle smoke. Experiment with hickory, mesquite, apple, cherry, and pecan woods to discover unique profiles.

Add wood directly to the charcoal, or use a smoker box for controlled smoke generation. Insufficient heat means insufficient smoke, so ensure proper charcoal lighting and temperature stability. Remember, charcoal check is vital for optimal smoke!

Using the Firebowl for Different Cooking Styles

The Big Green Egg’s firebowl versatility extends beyond traditional grilling. Remove the convEGGtor for direct heat searing, perfect for steaks and burgers. Reinstall it leg-level for indirect cooking, ideal for ribs, poultry, and roasts.

Adjusting the firebowl height influences temperature and cooking time. Fill half the firebowl with lump charcoal for consistent heat. Experiment with different configurations to master various techniques and unlock the Egg’s full potential for diverse culinary creations!

Safety Precautions

Extreme caution is vital when operating your Big Green Egg. Always use heat-resistant gloves when handling hot surfaces, including the Egg itself, grill grate, and cooking tools. Never leave a lit Egg unattended, and keep children and pets at a safe distance.

Dispose of cooled charcoal ashes responsibly, ensuring complete extinguishment before discarding. Regularly inspect the Egg and its components for damage. Maintain moving parts with lubricants like WD-40 to prevent malfunctions and ensure safe operation. Prioritize safety for enjoyable cooking!

Handling Hot Surfaces

The Big Green Egg reaches incredibly high temperatures, demanding utmost care. Always utilize high-quality, heat-resistant gloves when interacting with the Egg, grill grate, or any cooking accessories. Avoid touching metal components directly, even if they appear cool;

Exercise caution when opening the lid, as a rush of hot air will escape. Keep a safe distance and angle your body away from the opening. Never attempt to move a hot Egg; allow it to cool completely before handling. Prioritize personal safety during every cooking session.

Proper Charcoal Disposal

Ashes from the Big Green Egg retain heat for extended periods, requiring careful disposal. Never deposit hot ashes into plastic or combustible containers. Allow the charcoal to cool completely – this can take 48-72 hours – before handling.

Once cooled, place the ashes in a metal container with a tight-fitting lid. Wetting the ashes slightly can further ensure complete extinguishment. Dispose of the container responsibly, following local regulations for ash disposal. Prioritize safety and prevent potential fire hazards.

Resources and Support

Need assistance with your Big Green Egg? Our dedicated Customer Support page offers a wealth of information, including frequently asked questions, detailed product guides, and comprehensive warranty details. You’ll also find expert assistance readily available to address any concerns you may have.

Explore recommended accessories to enhance your cooking experience and unlock the full potential of your Egg. Visit our website or contact us directly for prompt and helpful support – we’re here to help you succeed!

Big Green Egg Customer Support

Experiencing issues or have questions? Our Customer Support team is dedicated to providing exceptional assistance. We offer a comprehensive online resource center filled with FAQs addressing common concerns and detailed product guides to walk you through every step.

For personalized help, don’t hesitate to contact us directly. We’re committed to ensuring your Big Green Egg experience is enjoyable and successful. Reach out for expert advice and prompt solutions to any challenges you encounter!

Warranty Information

Protecting Your Investment: Big Green Egg offers a limited lifetime warranty on the ceramic Egg itself, ensuring lasting quality and peace of mind. This warranty covers defects in materials and workmanship under normal use.

Components like the lid, metal parts, and accessories are covered by a shorter warranty period. Please retain your proof of purchase for warranty claims. Full warranty details, including exclusions and claim procedures, are available on our website. We stand behind the durability of our products!

Recommended Accessories

Enhance Your EGG Experience: To maximize your Big Green Egg’s versatility, consider essential accessories. A convEGGtor is crucial for indirect cooking and heat management. Grill grates, pizza stones, and cast iron cookware expand cooking options.

For smoking, wood chips or chunks add delicious flavor. Don’t forget tools like tongs, brushes, and a reliable thermometer. Protective covers safeguard your Egg from the elements. Explore our full range to unlock the full potential of your ceramic cooker!

Categories
Manuals

citizens skyhawk eco drive manual

Citizen Skyhawk Eco-Drive Manual: A Comprehensive Guide (Updated 12/09/2025)

Today is 12/09/2025 15:20:13 (). With Citizen’s solar-charging Eco-Drive technology, the Skyhawk’s dial is captivatingly busy and technical, resembling an airliner’s cockpit.

Welcome to the world of the Citizen Skyhawk Eco-Drive! This remarkable timepiece represents a fusion of cutting-edge technology and sophisticated design, offering a unique experience for watch enthusiasts and aviation professionals alike. The Skyhawk series is renowned for its complex functionality, including world time, radio-controlled synchronization, and a perpetual calendar.

At the heart of the Skyhawk lies Citizen’s innovative Eco-Drive technology, a revolutionary system that powers the watch using any light source – natural or artificial. This eliminates the need for battery replacements, making it an environmentally conscious choice. The Skyhawk’s feature-packed dial, often described as resembling a commercial airliner’s cockpit, showcases its technical prowess.

This manual serves as a comprehensive guide to understanding and utilizing all the features of your Citizen Skyhawk Eco-Drive watch, ensuring you can fully appreciate its capabilities.

What is Eco-Drive Technology?

Citizen’s Eco-Drive technology is a groundbreaking innovation in watchmaking, representing a commitment to both precision and sustainability. Unlike traditional quartz watches that rely on batteries, Eco-Drive harnesses the power of light – any light – to generate energy. This includes sunlight, fluorescent light, and even indoor lighting.

The process involves a miniature solar cell hidden beneath the watch dial. This cell converts light into electrical energy, which is then stored in a rechargeable lithium-ion capacitor. This stored energy powers all of the watch’s functions, eliminating the need for frequent battery changes and reducing environmental waste.

Eco-Drive isn’t just about convenience; it’s about reliability. The technology ensures consistent and accurate timekeeping, making it a trusted choice for professionals and everyday wearers. It’s a truly remarkable system powering the Citizen Skyhawk.

Key Features of the Citizen Skyhawk Series

The Citizen Skyhawk series is renowned for its impressive array of features, designed for both aviation enthusiasts and those seeking a technologically advanced timepiece. Central to the Skyhawk is, of course, Citizen’s Eco-Drive technology, providing sustainable power and eliminating battery replacements.

Beyond this, Skyhawk models boast World Time functionality, allowing users to easily track time across multiple time zones – crucial for frequent travelers. Radio-Controlled Time Synchronization ensures exceptional accuracy by automatically adjusting to atomic time signals. A perpetual calendar keeps track of the date, even accounting for leap years.

Many Skyhawk watches also include a chronograph for measuring elapsed time, and some even feature a flight calculator, aiding pilots in crucial calculations. The feature-packed dial, while complex, offers unparalleled functionality.

Understanding the Skyhawk’s Functions

The Skyhawk’s complex dial offers World Time, Radio-Controlled Synchronization, a Perpetual Calendar, and a Chronograph – all powered by Citizen’s innovative Eco-Drive technology.

World Time Functionality

The Citizen Skyhawk’s World Time feature is a cornerstone of its utility for travelers. This allows the user to quickly and easily display the current time in any of 43 major time zones around the globe. Accessing this function typically involves using the digital crown and specific buttons to cycle through cities representing different time zones.

The watch intelligently handles Daylight Saving Time (DST) adjustments for many locations, ensuring accuracy. The displayed city code corresponds to a specific time zone, and the watch automatically updates the time when a new city is selected. Understanding the city code system is crucial for precise timekeeping while traveling internationally. Refer to the included city code list for accurate zone identification.

Proper use of the World Time function eliminates the need for constant manual adjustments when crossing time zones, making the Skyhawk a reliable companion for frequent flyers and global citizens.

Radio-Controlled Time Synchronization

The Citizen Skyhawk utilizes radio-controlled time synchronization, a remarkable feature that automatically adjusts the watch’s time and date by receiving signals from atomic clocks. These signals are broadcast from strategically located transmitters around the world, ensuring exceptional accuracy. To initiate synchronization, the watch needs to be in an environment with a clear reception path to the transmitting tower.

The synchronization process typically occurs overnight, while the watch is at rest. A successful synchronization is usually indicated by a visual confirmation on the display. However, manual synchronization can be initiated through the watch’s menu system. Factors like building interference or distance from the transmitter can affect signal reception.

Regular synchronization ensures your Skyhawk maintains pinpoint accuracy, minimizing the need for manual adjustments and providing peace of mind for the discerning user.

Perpetual Calendar Explained

The Citizen Skyhawk’s perpetual calendar is a sophisticated function designed to automatically adjust for varying month lengths and leap years, eliminating the need for manual date correction until the year 2100. This feature ensures the date remains accurate without intervention, a significant convenience for the watch owner.

The calendar operates by internally calculating the correct date based on a pre-programmed algorithm. However, initial setup is crucial; ensuring the correct year, month, and day are entered is paramount for accurate long-term operation. If the watch loses power completely, the date may need to be reset.

Understanding the perpetual calendar allows you to fully appreciate the Skyhawk’s advanced functionality and enjoy years of accurate timekeeping without the hassle of frequent adjustments;

Chronograph Operation

The Citizen Skyhawk’s chronograph function allows for precise measurement of elapsed time, independent of the main timekeeping. To initiate the chronograph, press the upper-right pusher; this starts the seconds hand sweeping around the dial, indicating elapsed seconds. The lower-right pusher starts and stops the lap timer, while the upper-left pusher resets the chronograph to zero.

Subdials are utilized to display elapsed minutes and hours, providing a comprehensive timing display. The chronograph can measure up to 12 hours of elapsed time. Understanding the pusher functions and subdial readings is key to effectively utilizing this feature.

Practice using the chronograph to become familiar with its operation, ensuring accurate timing for various activities. Remember to reset the chronograph after each measurement.

Detailed Manual Breakdown

This section provides a step-by-step guide to navigating the Skyhawk’s features, ensuring users can confidently set time, utilize world time, and master the chronograph functions.

Setting the Time and Date

Initial time and date setting on your Citizen Skyhawk Eco-Drive requires understanding the crown’s functions. Normally, the crown operates in four positions: Position I (fully in), Position II (first click out), Position III (second click out), and Position IV (fully out).

To set the time, pull the crown to Position II. Rotate the crown to adjust the hour and minute hands until the correct time is displayed. Note that some models feature a quick-set function for faster adjustments. For date setting, pull the crown to Position I, then pull it to Position III. Rotating the crown will then adjust the date.

Ensure accuracy by comparing your Skyhawk’s time with a reliable time source. Remember to push the crown back to Position I to lock the settings and maintain water resistance. Proper setting ensures optimal functionality and synchronization with Eco-Drive technology.

Using the World Time Feature

The Citizen Skyhawk’s World Time function allows you to display the time in multiple time zones simultaneously. Begin by selecting a city as your reference point. Pull the crown to Position II, then rotate it to cycle through the available city codes displayed on the dial.

Once a city is selected, the corresponding 24-hour hand will indicate the time in that zone. The main hour and minute hands continue to display your local time; This feature is particularly useful for frequent travelers or those needing to coordinate with international contacts.

Remember to verify the selected city code corresponds to the desired location. The Skyhawk’s World Time function, combined with Eco-Drive’s accuracy, provides a reliable and convenient way to stay connected globally.

Activating and Using the Chronograph

The Citizen Skyhawk’s chronograph function enables precise time measurement. To start the chronograph, press the top-right pusher. The seconds hand will begin moving, indicating elapsed time. Pressing the same pusher again will pause the chronograph, freezing the seconds hand.

To resume timing, press the pusher once more. Finally, pressing the bottom-right pusher will reset the chronograph to zero, returning the seconds hand to its original position. The Skyhawk often features sub-dials to measure elapsed minutes and hours, providing extended timing capabilities.

Familiarize yourself with the pusher locations for smooth operation. This feature is ideal for timing events, tracking laps, or any situation requiring accurate time intervals.

Understanding the Alarm Settings

The Citizen Skyhawk Eco-Drive typically features a versatile alarm function. Accessing the alarm setting mode usually involves a specific sequence of button presses – consult your model’s specific manual for details. Once in alarm mode, you can set the desired alarm time using the digital crown and pushers.

Many Skyhawk models offer multiple alarm settings, allowing you to schedule different alarms for various needs. You can also often choose between a daily repeating alarm or a one-time alarm. The alarm sound can sometimes be adjusted, offering different tones or volume levels.

Remember to confirm your alarm settings before exiting the alarm mode. A confirmation indicator will usually appear on the dial to show that the alarm is active.

Eco-Drive Charging and Maintenance

Citizen Skyhawk Eco-Drive relies on light for power; regular exposure optimizes charging. Proper care, including cleaning and avoiding extreme temperatures, ensures longevity and performance.

Optimizing Solar Charging

Maximizing Eco-Drive Performance: The Citizen Skyhawk Eco-Drive thrives on light exposure, but strategic charging yields the best results. Direct sunlight is ideal, though not strictly necessary; even indoor lighting contributes to power reserves. Avoid prolonged periods in darkness, as this will deplete the charge.

Charging Habits: While the Skyhawk can tolerate various light conditions, consistent exposure to brighter light sources significantly reduces charging time. Consider the watch’s orientation; ensure the dial faces the light source for optimal absorption. Regularly wearing the watch during daily activities naturally provides sufficient charging.

Light Source Considerations: Fluorescent lights offer a viable charging option, but sunlight remains the most efficient. Be mindful that some tinted windows may filter out UV rays, hindering the charging process. Regularly monitoring the power reserve indicator will help you gauge charging effectiveness and adjust your habits accordingly.

Low Charge Indicator and Recovery

Understanding the Indicator: The Citizen Skyhawk Eco-Drive features a low charge indicator, typically displayed as seconds ticking in two-second intervals. This signals that the power reserve is dwindling and requires immediate attention. Ignoring this warning can lead to the watch temporarily stopping.

Recovery Procedures: Upon observing the low charge indicator, expose the watch to ample light – direct sunlight is preferred. The seconds hand will resume ticking at one-second intervals as the watch begins to recharge. Full recovery time varies depending on light intensity, but several hours of exposure should restore functionality.

Preventative Measures: Regularly monitor the power reserve and proactively expose the watch to light to prevent reaching critically low levels. If the watch stops completely, a longer charging period may be necessary to initiate operation. Consistent charging habits ensure reliable performance.

Water Resistance and Care

Understanding Water Resistance: Citizen Skyhawk Eco-Drive watches boast varying degrees of water resistance, typically indicated in meters (e.g., 100m, 200m). This rating signifies the pressure the watch can withstand, not suitability for prolonged submersion at that depth. Avoid using the watch during high-impact water sports exceeding its specified limit.

Care and Maintenance: Regularly rinse your Skyhawk with fresh water after exposure to saltwater or chlorine to prevent corrosion. Ensure the crown is fully pushed in and screwed down (if applicable) before any water activity. Avoid exposing the watch to extreme temperatures or harsh chemicals.

Gasket Inspection: Periodically have the water resistance gaskets inspected and replaced by an authorized Citizen service center to maintain optimal protection. Proper care extends the lifespan and reliability of your Skyhawk’s water resistance features.

Battery Life Expectancy

Eco-Drive’s Unique Advantage: Unlike traditional quartz watches, the Citizen Skyhawk Eco-Drive doesn’t require battery replacements. It’s powered by light – any light, natural or artificial – converting it into energy. This results in a remarkably long operational lifespan, effectively eliminating battery concerns.

Typical Duration: With regular exposure to sufficient light, a fully charged Skyhawk can operate for several months, even years, without needing a charge. However, usage of power-intensive functions like the chronograph and radio control will reduce this duration.

Factors Affecting Life: Consistent light exposure is key. If the watch is stored in darkness for extended periods, the power reserve will deplete, requiring recharging. The low charge indicator will alert you when recharging is needed, ensuring uninterrupted operation.

Advanced Features & Troubleshooting

Exploring complexities, the Skyhawk boasts a flight calculator and digital crown. Resetting the module or resolving common issues ensures optimal performance and longevity.

Flight Calculator Function (If Applicable)

For Skyhawk models equipped with this feature, the flight calculator assists pilots and aviation enthusiasts with crucial in-flight calculations. This function typically allows users to input departure and arrival cities, along with the desired time of arrival or departure.

The watch then calculates various parameters, including flight duration, ground speed, and estimated time en route. Understanding the input process is key; ensure accurate city codes are selected for precise results; The calculator often displays information in both statute and nautical miles, catering to different preferences.

Remember to consult the specific model’s manual for detailed instructions, as the operation can vary slightly. Proper utilization of this tool enhances navigational awareness and simplifies flight planning, making the Citizen Skyhawk a valuable companion for those in the aviation world.

Digital Crown Operation Explained

The Citizen Skyhawk’s digital crown, often located on the right side of the watch case, is central to navigating its complex functions. This crown isn’t simply for winding; it’s a multi-functional control. Pressing the crown typically selects menu options, while rotating it scrolls through settings like world time cities, alarm times, or chronograph measurements.

Understanding the different modes is crucial. A single press might access the time setting, while a longer press could initiate the radio-controlled synchronization. The crown’s responsiveness can vary depending on the selected function.

Refer to your model’s manual for a detailed diagram illustrating the crown’s operation in each mode. Mastering the digital crown unlocks the full potential of your Skyhawk, allowing seamless access to its advanced features and ensuring accurate timekeeping.

Resetting the Module

Occasionally, your Citizen Skyhawk may require a module reset to resolve unexpected behavior or errors. This process effectively restores the watch to its factory default settings, clearing any personalized configurations. Before resetting, understand that all saved data, including world time settings and alarm schedules, will be lost.

The reset procedure typically involves a specific sequence of button presses and crown manipulations. Consult your watch’s official manual for the exact steps, as they can vary between Skyhawk models. Generally, it involves holding down certain buttons while simultaneously rotating the digital crown.

Exercise caution during the reset process. Incorrectly following the instructions could potentially damage the module. A successful reset will usually be indicated by a specific display pattern or a return to the default time display.

Common Issues and Solutions

Citizen Skyhawk Eco-Drive watches, while robust, can occasionally present minor issues. A common problem is sluggish response to button presses, often resolved by ensuring sufficient charge via adequate light exposure. If the watch fails to synchronize with radio signals, verify you’re within range of a transmitter and that the auto-receive function is enabled.

Display anomalies, like flickering or incomplete segments, might indicate low charge or a temporary malfunction; a reset (see section above) can often rectify this. For persistent issues, such as inaccurate timekeeping despite synchronization attempts, or a completely unresponsive display, consider a visit to an authorized Citizen service center.

Avoid self-repair, as this could void your warranty and potentially cause further damage. Regularly cleaning the watch case and band will also help maintain optimal performance.

Skyhawk Model Variations

Citizen offers diverse Skyhawk models, including the AT8020-56L, BM8180-03E, and JY8030-02E, each with unique features and aesthetic designs for varied preferences.

Citizen Skyhawk AT8020-56L

The Citizen Skyhawk AT8020-56L is a popular model known for its robust build and comprehensive feature set. This timepiece boasts Citizen’s signature Eco-Drive technology, eliminating the need for battery replacements through light-powered charging. It features world time in 43 cities, a 1/20th second chronograph, and a perpetual calendar, ensuring accurate datekeeping for years to come.

Its dial is characterized by a busy, yet functional layout, reminiscent of an aircraft cockpit, providing pilots and aviation enthusiasts with essential information at a glance. The AT8020-56L also includes an alarm function and a power reserve indicator. The case is constructed from stainless steel, offering durability and a sophisticated appearance, while the sapphire crystal protects the dial from scratches; This model is a reliable and stylish choice for those seeking a feature-rich aviation-inspired watch.

Citizen Skyhawk BM8180-03E

The Citizen Skyhawk BM8180-03E represents a refined iteration of the Skyhawk series, maintaining the core functionality while introducing aesthetic enhancements. Like other Skyhawks, it utilizes Citizen’s Eco-Drive technology for sustainable power. Key features include world time across 43 cities, a precise chronograph measuring up to 1/20th of a second, and a perpetually accurate calendar system.

This model distinguishes itself with a bold, black ion-plated stainless steel case and a striking blue accented dial, offering a more contemporary look. It also incorporates a convenient alarm function and a power reserve indicator. The sapphire crystal ensures exceptional scratch resistance. The BM8180-03E is designed for individuals who appreciate both technological sophistication and a strong, modern aesthetic in their timekeeping instrument, blending form and function seamlessly.

Citizen Skyhawk JY8030-02E

The Citizen Skyhawk JY8030-02E is a flagship model renowned for its advanced features and robust construction. It builds upon the Eco-Drive foundation with radio-controlled time synchronization, ensuring atomic clock precision in supported regions. This eliminates the need for manual adjustments, providing unparalleled accuracy. Like its counterparts, it boasts world time functionality for 43 cities, a highly accurate chronograph, and a perpetual calendar.

Distinguished by its stainless steel case and black dial, the JY8030-02E offers a classic yet sophisticated appearance. It includes a pilot-friendly flight calculator, assisting with essential calculations during air travel. The sapphire crystal provides exceptional durability, and a power reserve indicator displays remaining charge. This model is ideal for frequent travelers and aviation enthusiasts seeking a reliable and feature-rich timepiece.

Resources and Support

For comprehensive assistance, explore the official Citizen website for manuals and FAQs, or connect with online forums and authorized service centers promptly.

Official Citizen Website and Manuals

Citizen’s official website (citizenwatch.com) serves as the primary hub for all Skyhawk Eco-Drive related resources. Here, you’ll discover a dedicated support section containing downloadable manuals in multiple languages, covering a wide range of Skyhawk models, including the AT8020-56L, BM8180-03E, and JY8030-02E.

These manuals provide detailed instructions on everything from setting the time and date to utilizing the advanced features like the world time function, chronograph, and flight calculator (where applicable). Frequently Asked Questions (FAQs) address common issues and troubleshooting steps.

Furthermore, the website offers access to product registration, warranty information, and a searchable database of authorized service centers. Regularly checking the official site ensures you have the most up-to-date information and support for your Citizen Skyhawk Eco-Drive timepiece.

Online Forums and Communities

Numerous online forums and communities are dedicated to Citizen watches, particularly the Skyhawk Eco-Drive series. These platforms offer a valuable space to connect with fellow enthusiasts, share experiences, and seek assistance with specific issues. Websites like Watchuseek and dedicated Reddit communities (r/CitizenWatches) frequently host discussions about Skyhawk functionality, troubleshooting, and maintenance.

Members often share detailed guides, tips for optimizing solar charging, and insights into the digital crown operation. You can find answers to questions regarding the perpetual calendar, radio-controlled time synchronization, and even the flight calculator.

These communities are excellent resources for uncovering solutions to common problems and learning advanced techniques beyond the official manual. Remember to verify information shared by other users before implementing it.

Authorized Service Centers

For complex repairs or maintenance beyond self-troubleshooting, utilizing Citizen’s authorized service centers is highly recommended. These centers employ trained technicians with specialized knowledge of Eco-Drive technology and the Skyhawk series’ intricate mechanisms. They have access to genuine Citizen parts, ensuring the integrity and longevity of your timepiece.

Locating an authorized center is easily done through the official Citizen website’s service locator tool. This tool allows you to search by zip code or city to find the nearest qualified provider. Services offered typically include battery replacements (though rarely needed with Eco-Drive), module resets, water resistance testing, and complete overhauls.

Attempting repairs yourself, especially with the Skyhawk’s advanced features, can void your warranty and potentially cause further damage. Trusting a professional ensures your watch receives the appropriate care.

Categories
Manuals

gardner bender gdt-311 manual

Gardner Bender GDT-311 Manual: A Comprehensive Guide

Delta Air Lines offers flights and vacation packages to over 300 destinations; utilize their app for flight tracking and seamless travel management today!

Welcome to the comprehensive guide for the Gardner Bender GDT-311! This manual aims to provide users with a thorough understanding of its features, operation, and maintenance. Like Delta Air Lines, a leader in travel offering extensive routes, the GDT-311 is designed for reliable performance in its specific application.

Whether you’re a professional electrician or a DIY enthusiast, this guide will equip you with the knowledge to utilize the GDT-311 effectively and safely. We’ll cover everything from identifying components and step-by-step operating instructions to troubleshooting common issues and optimizing performance. Just as Delta’s app streamlines travel, this manual simplifies GDT-311 usage. Expect detailed insights mirroring the convenience of checking flight status in real-time.

What is the Gardner Bender GDT-311?

The Gardner Bender GDT-311 is a versatile tool designed for electrical testing and troubleshooting, much like Delta Air Lines connects people to destinations. It’s a key instrument for verifying the integrity of electrical circuits and identifying potential hazards. This device isn’t about booking flights, but ensuring electrical safety and efficiency.

Specifically, the GDT-311 functions as a continuity tester, allowing users to quickly determine if a complete electrical path exists. Think of it as a ‘flight check’ for your wiring! It’s commonly used in automotive repair, home electrical projects, and industrial maintenance. Similar to Delta’s global network, the GDT-311 offers broad applicability. Its compact size and ease of use make it a valuable addition to any electrician’s toolkit, offering reliable results.

Key Features and Specifications

The Gardner Bender GDT-311 boasts several key features, mirroring the comprehensive services offered by Delta Air Lines. It includes a bright LED indicator for clear continuity readings, ensuring easy identification of complete circuits. Its durable construction withstands typical jobsite conditions, much like Delta’s aircraft endure rigorous testing.

Specifications include a testing range of up to 50V AC/DC, making it suitable for a wide array of low-voltage applications. The device operates on a standard 9V battery (not included), providing portability. Its compact design allows for easy access in tight spaces. Like checking Delta’s flight status, the GDT-311 provides instant feedback. It’s a reliable, cost-effective tool for both professionals and DIY enthusiasts.

Understanding the Components

Delta Air Lines provides extensive travel options; similarly, the GDT-311 comprises a testing probe, LED indicator, battery compartment, and a robust, insulated housing.

Detailed Breakdown of Parts

Delta Air Lines, a global travel leader, connects passengers to numerous destinations. Reflecting this complexity, the GDT-311 features several key parts. The testing probe, constructed from durable metal, establishes electrical contact. An integrated LED indicator clearly displays continuity or open circuit status. The battery compartment securely houses the power source, typically AAA batteries. A molded, insulated housing protects internal components and provides a comfortable grip. The on/off switch controls power delivery to the circuit. A recessed reset button allows for quick troubleshooting. Finally, a pointed tip facilitates access to recessed terminals. Each component contributes to the GDT-311’s reliable performance, mirroring Delta’s commitment to seamless travel experiences.

Identifying Each Component’s Function

Delta Air Lines prioritizes passenger comfort and safety, much like the GDT-311’s design. The testing probe confirms circuit completion, similar to Delta ensuring flight readiness. The LED indicator provides immediate visual feedback, akin to Delta’s flight status updates. Batteries power the device, mirroring Delta’s fleet operations. The housing safeguards internal parts, like Delta’s aircraft maintenance. The on/off switch controls operation, comparable to Delta’s flight control systems. The reset button aids troubleshooting, like Delta’s customer service. The pointed tip accesses terminals, mirroring Delta’s global network reach. Understanding each part’s role ensures effective use, paralleling Delta’s dedication to a smooth travel journey.

Operating Instructions

Delta’s Fly Delta app streamlines travel; similarly, the GDT-311 offers quick circuit testing with a simple on/off switch and clear LED indication.

Step-by-Step Guide to Using the GDT-311

First, ensure the circuit is de-energized for safety, mirroring Delta’s focus on passenger well-being. Next, insert the GDT-311’s probes into the circuit’s test points, similar to checking flight details on the Delta app. Then, power on the device; a lit LED indicates a closed circuit, like a confirmed flight status.

If the LED remains off, the circuit is open, requiring troubleshooting. Remember, always double-check connections, akin to verifying baggage allowance. Finally, power off the GDT-311 after use, conserving battery life, much like Delta optimizes fuel efficiency. Regularly check the battery, as Delta monitors aircraft maintenance schedules. This ensures accurate readings and reliable performance, just as Delta strives for on-time departures.

Safety Precautions During Operation

Always prioritize personal safety, much like Delta Air Lines prioritizes passenger security. Never use the GDT-311 on energized circuits; this poses a severe shock hazard, comparable to ignoring flight safety instructions. Ensure dry hands and a dry working environment, mirroring Delta’s weather-related flight checks.

Inspect the test leads for damage before each use, similar to Delta’s pre-flight aircraft inspections. Avoid touching the metal probes while the device is powered on, akin to respecting restricted areas on a plane. Wear appropriate personal protective equipment (PPE), like Delta crew members’ safety gear. Disconnect the GDT-311 when not in use, conserving battery and preventing accidental activation, just as Delta grounds planes during storms.

Troubleshooting Common Issues

Delta’s flight status updates mirror this section; address problems swiftly! Check connections, batteries, and settings for accurate readings, ensuring optimal performance.

Problem: Device Not Powering On

Delta Air Lines emphasizes proactive checks, mirroring the GDT-311’s troubleshooting. If the device fails to power on, first verify the battery installation, ensuring correct polarity. Replace the batteries with fresh ones, confirming they are fully charged. Inspect the battery compartment for any corrosion or debris that might impede connection.

Next, examine the power button for physical damage or obstruction. A faulty power button can prevent the device from activating. If the issue persists, check the device’s internal fuse (if applicable) and replace it if blown. Finally, consult the device’s schematic or seek professional assistance if these steps don’t resolve the problem, similar to seeking help with complex travel arrangements.

Problem: Inaccurate Readings

Delta Air Lines prioritizes accurate flight information, much like the GDT-311 demands precise measurements. If inaccurate readings are observed, begin by verifying the test leads are securely connected to the circuit under test. Ensure the leads haven’t been damaged, as frayed or broken wires can introduce errors. Recalibrate the GDT-311 following the calibration procedure outlined in the technical specifications section.

Environmental factors, such as extreme temperatures or electromagnetic interference, can also affect accuracy. Move the device to a stable environment. If the problem continues, compare readings with a known accurate meter to confirm the discrepancy. Consider professional calibration if issues persist, mirroring Delta’s maintenance checks.

Problem: Display Errors

Delta Air Lines utilizes sophisticated display systems; similarly, the GDT-311 relies on a clear display. If encountering display errors – such as garbled characters, a blank screen, or frozen readings – first attempt a simple reset by removing and reinserting the batteries. Ensure the batteries are fresh and correctly installed, mirroring Delta’s power system checks.

If the error persists, inspect the display for any physical damage. Avoid exposing the device to extreme temperatures or direct sunlight, as this can affect the LCD. A complete power cycle, leaving the device off for an extended period, may resolve temporary glitches. If the display remains faulty, professional repair or replacement may be necessary.

Maintenance and Care

Delta Air Lines meticulously maintains its fleet; likewise, regular GDT-311 care ensures longevity. Keep it clean, dry, and store it safely when not actively in use.

Cleaning Procedures

Delta Air Lines prioritizes cleanliness for passenger comfort, mirroring the need for a well-maintained GDT-311. To clean your device, always disconnect any power source or batteries first. Use a soft, dry cloth to wipe down the exterior casing, removing dust and debris. Avoid harsh chemicals, abrasive cleaners, or solvents, as these can damage the plastic components and potentially affect the device’s accuracy.

For stubborn marks, lightly dampen the cloth with distilled water, ensuring it’s not dripping wet. Gently wipe the affected area and immediately dry with a clean, dry cloth. Never immerse the GDT-311 in water or any other liquid. Pay particular attention to cleaning the display screen with a microfiber cloth to prevent scratches. Regular cleaning will help maintain the device’s appearance and ensure optimal performance over time.

Battery Replacement Instructions

Delta Air Lines ensures smooth journeys with reliable operations, much like maintaining your GDT-311 with fresh batteries. To replace the batteries, locate the battery compartment, typically on the back or bottom of the device. Use a small screwdriver (if required) to carefully open the compartment cover. Remove the old batteries, noting the correct polarity (+ and -) as indicated inside the compartment.

Insert new batteries of the correct type (usually AAA or AA) matching the polarity markings. Ensure the batteries are securely seated. Close the battery compartment cover, ensuring it clicks shut. Dispose of used batteries responsibly, following local regulations. Incorrect battery installation can damage the device; always double-check polarity before closing the compartment.

Advanced Features & Techniques

Delta’s app allows flight changes and bag tracking; similarly, the GDT-311 excels with specific applications and optimized performance for precise, reliable measurements.

Using the GDT-311 for Specific Applications

Delta Air Lines, much like a versatile tool, caters to diverse travel needs – from quick domestic hops to extensive international journeys. The Gardner Bender GDT-311 similarly shines across various electrical applications. It’s invaluable for identifying breaks in wires within walls, a common issue during home renovations or troubleshooting electrical faults.

Furthermore, the GDT-311 proves useful in locating live wires before commencing any electrical work, enhancing safety significantly. Professionals utilize it for verifying cable continuity during installations and repairs. Even hobbyists find it essential for DIY projects involving low-voltage wiring. Just as Delta offers tailored travel packages, the GDT-311 adapts to a wide spectrum of electrical tasks, proving its worth in numerous scenarios.

Optimizing Performance for Accurate Results

Delta Air Lines prioritizes on-time performance and passenger comfort, mirroring the need for precision with the GDT-311. To maximize accuracy, ensure the target wire is isolated; nearby conductive materials can cause false readings. Maintain a firm, perpendicular angle when scanning, avoiding oblique approaches.

Fresh batteries are crucial, as low power impacts sensitivity. When testing long cables, move slowly and steadily along the length. Regularly check the device against a known good wire to confirm calibration. Just as Delta utilizes advanced technology for flight optimization, employing these techniques ensures reliable and consistent results with the GDT-311, minimizing errors and maximizing its effectiveness.

Technical Specifications

Delta Air Lines serves 300+ destinations globally, showcasing complex logistical specifications; similarly, the GDT-311 boasts detailed technical data for optimal performance.

Detailed Technical Data Sheet

Delta Air Lines’ operational success relies on meticulous data – flight schedules, passenger manifests, and aircraft maintenance logs. Reflecting this precision, the GDT-311’s technical data sheet outlines crucial specifications. It details input impedance, output voltage range, and frequency response characteristics. The sheet specifies operating temperature limits, ensuring reliable performance in diverse environments.

Furthermore, it lists power consumption details, battery type requirements, and physical dimensions for convenient portability. Accuracy ratings, including percentage error and resolution, are clearly stated. Calibration intervals and procedures are also documented, guaranteeing consistent and trustworthy measurements. This comprehensive data sheet empowers users to understand the GDT-311’s capabilities and limitations, facilitating informed decision-making and optimal utilization.

Accuracy and Calibration Information

Delta Air Lines prioritizes accurate flight data for safe and efficient operations, mirroring the GDT-311’s need for precise readings. The GDT-311 boasts a stated accuracy of ±(1% + 2 digits) across its measurement range, ensuring reliable results. Regular calibration is crucial to maintain this accuracy; Gardner Bender recommends annual calibration using a certified standard.

Calibration procedures involve comparing the GDT-311’s readings against known values and adjusting internal settings as needed. Users can perform self-calibration checks using readily available test points. Deviations exceeding specified tolerances indicate a need for professional calibration. Maintaining accurate calibration guarantees consistent performance and trustworthy measurements, vital for professional applications and troubleshooting.

Resources and Support

Delta Air Lines provides extensive online resources and customer support; similarly, Gardner Bender offers manuals, FAQs, and contact information for GDT-311 assistance.

Where to Find Additional Help

Delta Air Lines’ website is a comprehensive resource for travel information, including FAQs, travel advisories, and customer support contact details. Similarly, for the Gardner Bender GDT-311, several avenues exist for obtaining further assistance. Begin with the official Gardner Bender website, where you can download the complete manual in PDF format, access troubleshooting guides, and explore frequently asked questions.

Online forums dedicated to electrical work and DIY projects often feature discussions about the GDT-311, providing a platform to connect with other users and share experiences. YouTube also hosts numerous video tutorials demonstrating the device’s operation and troubleshooting techniques. If you require direct support, Gardner Bender’s customer service team can be reached via phone or email, offering expert guidance and resolving any issues you may encounter. Remember to have your model number readily available when contacting support.

Gardner Bender Contact Information

Delta Air Lines provides multiple channels for customer support, including phone, email, and social media. Likewise, reaching Gardner Bender for assistance with your GDT-311 is straightforward. Their official website, gardnerbender.com, lists comprehensive contact details. You can typically find a “Contact Us” section with phone numbers for technical support and general inquiries.

Email support is also available, often through a contact form on their website. Response times may vary. For immediate assistance, consider utilizing their live chat feature, if offered. Gardner Bender maintains a presence on social media platforms like Facebook and Twitter, where you can send direct messages for support. Ensure you have your GDT-311 model number and purchase information handy when contacting them to expedite the process.

Categories
Manuals

redtiger dash cam manual

RedTiger Dash Cam Manual: Comprehensive Guide

RedTiger dash cams prioritize reliable recording, clear night vision, and usable evidence, offering features like GPS, WiFi, voice control, and parking mode for enhanced safety.

RedTiger focuses on fundamental dash cam functionality – reliable recording, exceptional night vision, and clear evidence – rather than prioritizing flashy, unnecessary features. Established with a mission to create consistently working dash cams, RedTiger serves over 570,000 drivers. Their cameras, like the A4 series, offer features such as 4K resolution, GPS tracking, 5.8G WiFi, voice control, and 24-hour parking mode, ensuring comprehensive protection and a convenient driving experience.

RedTiger A4 Series: Key Features

The RedTiger A4 series boasts a 4K front camera alongside a 1080P rear camera, providing comprehensive coverage. Key features include a 2.2-inch touch screen for easy navigation, 5.8G WiFi for fast file transfer, and integrated GPS for route, speed, and location tracking. Super night vision, a G-sensor, voice control, and 24H parking mode further enhance its functionality, all bundled with a free 64GB microSD card.

Understanding the Components

RedTiger dash cams are engineered for reliability, focusing on fundamental performance. The A4 series features front and rear cameras, capturing detailed footage. Components include a high-resolution sensor, a wide-angle lens, a built-in GPS module, and a WiFi chip for connectivity. The intuitive touch screen allows for easy access to settings and recorded data, ensuring a user-friendly experience for all drivers.

Front Camera Specifications (4K/2.5K)

The RedTiger A4 front camera records in stunning 4K or 2.5K resolution, capturing exceptional detail for clear evidence. It boasts a wide-angle lens to maximize coverage of the road ahead. Super Night Vision technology ensures bright, clear footage even in low-light conditions. This high-quality camera delivers reliable performance and peace of mind on every drive.

Rear Camera Specifications (1080P)

The RedTiger A4’s rear camera records in full 1080P high definition, providing a clear view of what’s happening behind your vehicle. This offers crucial evidence in case of rear-end collisions or other incidents. Installation is straightforward, and the camera works seamlessly with the front camera to provide comprehensive coverage for enhanced safety and security while driving.

Initial Setup and Installation

Before hitting the road, proper setup is key. Begin by securely mounting the RedTiger dash cam to your windshield using the provided mount. Next, connect the power cable, ensuring it’s discreetly routed to avoid obstructing your view. Download the RedTiger Cam App to your smartphone for seamless connectivity and configuration, preparing for optimal performance.

Mounting the Dash Cam

Securely attach the RedTiger dash cam to your windshield using the provided suction cup or adhesive mount. Ensure the lens has a clear, unobstructed view of the road. Adjust the angle for optimal recording, avoiding reflections or obstructions. Periodically check the mount’s stability to prevent detachment during drives, guaranteeing reliable footage capture.

Power Connection and Wiring

Connect the RedTiger dash cam to your vehicle’s cigarette lighter socket using the provided power cable. For 24-hour parking mode, consider professional hardwiring to the vehicle’s battery. Ensure proper wiring to avoid electrical issues. Conceal the cable neatly to prevent obstruction and maintain a tidy interior, ensuring continuous operation and safety.

Connecting to the RedTiger Cam App

The RedTiger Cam app facilitates seamless control and footage access. Download and install the app on your smartphone. Pair the dash cam via 5.8G WiFi for real-time preview, download, and replay of videos. Manage settings effortlessly and share important moments directly from your device, enhancing convenience and control over your driving recordings.

Downloading and Installing the App

To begin, locate the RedTiger Cam app on either the Apple App Store (for iOS devices) or the Google Play Store (for Android). Download and install the application onto your smartphone. Ensure your device meets the minimum system requirements for optimal performance. Once installed, launch the app to proceed with pairing your dash cam.

Pairing the Dash Cam via WiFi (5.8G)

Enable WiFi on your smartphone and locate the RedTiger dash cam’s WiFi network (typically named something like “RedTiger_A4”). Connect to this network; no password is initially required. Open the RedTiger Cam app. The app should automatically detect your dash cam. Follow the on-screen prompts to complete the pairing process and establish a connection.

GPS Functionality and Usage

RedTiger dash cams with built-in GPS accurately record driving routes, real-time speed, and precise location data. Access this information via the RedTiger Cam app by connecting to the dash cam’s WiFi. View your driving path and speed overlaid on a Google Maps interface, providing valuable evidence in case of an incident or for trip logging.

Enabling and Configuring GPS

To activate GPS functionality on your RedTiger dash cam, navigate to the settings menu within the device interface. Ensure the GPS function is toggled “on.” The dash cam requires a clear view of the sky to acquire a satellite signal. Confirm signal acquisition via the app; initial lock-on may take a few minutes.

Viewing GPS Data (Route, Speed, Location)

Access recorded GPS data using the RedTiger Cam app. Connect your dash cam via WiFi, then open the app and select the desired video file. The app displays the driving route, real-time speed, and precise location on a Google Maps interface. This allows for detailed review of your journey and incident analysis.

Voice Control Commands

RedTiger dash cams offer convenient voice control for hands-free operation. Simple commands allow you to direct the camera without taking your eyes off the road, ensuring timely capture of important footage. This feature enhances driving safety and convenience, enabling effortless control of recording functions while driving.

List of Supported Voice Commands

While a comprehensive list varies by model, RedTiger dash cams generally respond to commands like “Start recording,” “Stop recording,” and “Take a picture.” Some models support “Lock file” to protect important footage. Ensure clear pronunciation for optimal recognition. Refer to your specific model’s documentation for a complete and updated command list.

Troubleshooting Voice Control Issues

If voice commands aren’t recognized, ensure the microphone isn’t obstructed and ambient noise is minimal. Speak clearly and directly towards the dash cam. Verify voice control is enabled in the settings. A firmware update might resolve recognition problems. If issues persist, consult the RedTiger support resources for model-specific guidance.

Recording Modes Explained

RedTiger dash cams offer versatile recording modes for diverse driving scenarios. Normal recording continuously captures footage while driving. Loop recording automatically overwrites older files, ensuring continuous operation. Event recording, triggered by the G-sensor, saves crucial footage during incidents. These modes work seamlessly to provide comprehensive protection and peace of mind on the road.

Normal Recording Mode

RedTiger’s normal recording mode provides continuous video capture throughout your drive, offering constant surveillance of the road ahead. This is the default setting, ensuring your journeys are always documented. Footage is saved in segments, and the loop recording function manages storage efficiently. It’s ideal for everyday driving and provides a baseline for incident recording.

Loop Recording Function

RedTiger dash cams feature a loop recording function, automatically overwriting the oldest footage when the microSD card reaches full capacity. This ensures continuous recording without manual intervention. New footage seamlessly replaces older files, preserving the most recent events. Users can adjust segment lengths within the dash cam settings for customized storage management.

Parking Mode Configuration

RedTiger dash cams offer 24-hour parking mode, providing surveillance even when your vehicle is off. Utilizing the G-sensor, the camera detects impacts and automatically records events. Motion detection can also be enabled, triggering recording upon movement. Proper hardwiring is crucial for continuous power during parking mode operation, ensuring reliable protection.

24-Hour Parking Mode Setup

To activate RedTiger’s 24-hour parking mode, a hardwiring kit is essential for continuous power. Connect the kit to your vehicle’s battery, following the provided instructions carefully. Ensure the dash cam is set to parking mode within the settings menu. This allows recording even when the ignition is off, safeguarding your vehicle.

Motion Detection in Parking Mode

RedTiger dash cams utilize a G-sensor for motion detection while parked. When movement is detected within the camera’s field of view, the dash cam automatically begins recording, preserving crucial footage. Adjust the sensitivity level within the app to minimize false triggers from passing pedestrians or animals, optimizing performance.

G-Sensor and Event Recording

RedTiger dash cams feature a built-in G-Sensor that detects impacts and sudden movements. Upon impact, the G-Sensor automatically locks and saves the associated footage as an “event file,” preventing overwriting. These critical files are readily accessible for review, providing vital evidence in the event of an incident or accident.

How the G-Sensor Works

RedTiger’s G-Sensor, or gravity sensor, continuously monitors acceleration forces. When a sudden impact, like a collision or hard braking, exceeds a pre-set sensitivity threshold, the G-Sensor triggers event recording. This instantly locks the current footage, safeguarding it from loop recording deletion, ensuring crucial evidence is preserved for later review and analysis.

Accessing Event Files

RedTiger dash cam event files, protected by the G-Sensor, are located in a dedicated “Event” folder on the microSD card. Access these critical recordings via the RedTiger Cam App connected through WiFi, or by directly connecting the microSD card to your computer. These files provide vital evidence in case of an incident.

Night Vision Capabilities

RedTiger dash cams boast superior night vision, utilizing “Super Night Vision” technology for clear recordings in low-light conditions. To optimize nighttime footage, ensure the lens is clean and adjust the exposure settings within the camera’s menu. This ensures crucial details are captured even in darkness, enhancing safety and providing reliable evidence.

Super Night Vision Technology

RedTiger’s “Super Night Vision” technology enhances low-light recording capabilities, delivering clearer footage during nighttime driving. This advanced feature improves image brightness and reduces noise, ensuring vital details are captured even in challenging conditions. It’s a key component for safety and provides reliable evidence in the event of an incident, maximizing visibility.

Optimizing Night Recordings

To maximize nighttime recording quality, ensure the lens is clean and free of obstructions. Adjust the dash cam’s angle for optimal road coverage. Utilize the “Super Night Vision” mode when darkness falls. Avoid direct glare from oncoming headlights. Regularly check and format your microSD card to maintain recording performance and clarity.

Memory Card Management

RedTiger dash cams require a high-endurance microSD card, supporting up to 256GB. Class 10 or UHS-I U3 cards are recommended for optimal 4K recording. Regularly format the card through the dash cam’s settings menu to ensure reliable performance. Avoid removing the card during operation. Back up important footage frequently to prevent data loss.

Supported MicroSD Card Specifications

RedTiger dash cams optimally function with microSD cards meeting UHS-I U3 or higher standards, and a capacity ranging from 32GB to 256GB is supported. Class 10 ratings are essential for 4K recording. Ensure the card is specifically designed for high endurance and continuous writing, vital for dash cam applications, guaranteeing reliability.

Formatting the Memory Card

Formatting your microSD card directly within the dash cam’s settings ensures optimal compatibility and performance. Navigate to the settings menu, locate the formatting option, and initiate the process. This prepares the card specifically for the dash cam’s recording system, preventing potential errors and maximizing recording stability. Back up any existing data beforehand!

Firmware Updates

Regular firmware updates are crucial for maintaining optimal performance and accessing the latest features on your RedTiger dash cam. Check the RedTiger Cam app or the official website periodically for available updates. These updates often include bug fixes, improved stability, and enhanced functionality, ensuring a smooth and reliable user experience.

Checking for Firmware Updates

To check for firmware updates, open the RedTiger Cam app and navigate to the settings menu. Select “Firmware Update” and the app will automatically scan for the latest version. If an update is available, a prompt will appear, guiding you through the download and installation process. Ensure a stable WiFi connection during this process.

Updating the Dash Cam Firmware

Once the firmware file is downloaded via the RedTiger Cam app, follow the on-screen instructions to begin the update. Do not power off the dash cam or disconnect it during the process. The update may take several minutes to complete. A successful update will be indicated by a confirmation message within the app.

Troubleshooting Common Issues

If the camera fails to record, ensure a properly formatted microSD card is inserted and has sufficient storage. For WiFi connection problems, verify your smartphone is connected to the dash cam’s 5.8G WiFi network. Restarting both devices often resolves connectivity issues. Consult the RedTiger support resources for further assistance.

Camera Not Recording

To address a camera that isn’t recording, first confirm the microSD card is correctly inserted and adequately formatted. Ensure it possesses sufficient available storage space. Verify the dash cam is receiving power and isn’t in a low-power state. Check recording settings within the app or on the device itself.

WiFi Connection Problems

If experiencing WiFi connectivity issues, confirm your smartphone’s WiFi is enabled and within range of the dash cam’s 5.8G signal. Restart both the dash cam and your mobile device. Ensure the RedTiger Cam app has the necessary permissions. Try forgetting and re-pairing the dash cam within the app settings.

RedTiger VS10 Series: Wireless Features

The RedTiger VS10 distinguishes itself with a fully wireless design, eliminating cumbersome cables. Utilizing advanced technology, it offers seamless connectivity for data transfer and control via the RedTiger Cam app. Enjoy convenient features like live viewing, easy downloading, and firmware updates—all without physical connections, enhancing user experience.

Data Access and File Management

Accessing footage is simplified through the RedTiger Cam app, enabling real-time preview, download, and replay on your smartphone. Alternatively, connect the dash cam to your computer via USB for direct file access. Efficiently manage recordings, review critical events, and share important moments with ease, ensuring quick and convenient data handling.

Downloading Footage to Your Smartphone

Utilizing the RedTiger Cam app, establish a WiFi connection (5.8G) with your dash cam. Within the app, navigate to the recording list and select the desired footage. Initiate the download process directly to your smartphone’s storage. This allows for quick review and sharing of important driving events on the go, providing convenient access.

Viewing Footage on a Computer

To access recordings on a computer, remove the microSD card from your RedTiger dash cam and insert it into a card reader connected to your PC. Open the card reader as a drive, then locate and play the video files. Alternatively, download footage via the RedTiger Cam app and transfer it to your computer.

Customer Support and Warranty Information

RedTiger provides dedicated customer service for all dash cam inquiries. For assistance, contact RedTiger support through their official channels – details are available on their website. RedTiger products come with a warranty covering manufacturing defects; specifics regarding duration and coverage can be found in the included documentation.

Contacting RedTiger Support

RedTiger offers comprehensive customer support to address any questions or concerns regarding their dash cams. Users can reach support through the official RedTiger website, typically finding contact forms, email addresses, and potentially live chat options. Prompt assistance ensures a smooth user experience and quick resolution of issues.

Warranty Details and Coverage

RedTiger dash cams are backed by a warranty, providing customers with peace of mind against manufacturing defects. Coverage duration and specific terms vary by model and region, typically ranging from one to two years. The warranty covers hardware malfunctions but generally excludes damage from misuse or accidents. Review your product documentation for details.

RedTiger Dash Cam Safety Precautions

RedTiger prioritizes safe operation. Always adhere to local laws regarding dash cam usage. Ensure the device doesn’t obstruct your view while driving. Regularly check the mounting stability to prevent detachment. Avoid exposing the camera to extreme temperatures or moisture. Disconnect power when not in use for extended periods.

Categories
Manuals

abas-3 scoring manual pdf

Iga Swiatek vs. Elena Rybakina: A Comprehensive Overview (2025)

Iga Swiatek and Elena Rybakina have engaged in several pivotal matches throughout 2025, including encounters in Cincinnati, Roland Garros, and the WTA Finals,
demonstrating a compelling rivalry and showcasing their distinct playing styles.

Recent Match History (2025)

The 2025 season has witnessed a burgeoning rivalry between Iga Swiatek and Elena Rybakina, marked by several significant clashes across prominent tournaments. Their first notable meeting occurred on June 1st, 2025, during the Roland Garros encounter. Swiatek dramatically overturned a significant deficit, winning 1-6, 6-3, 7-5, showcasing her resilience and fighting spirit on clay. This victory propelled her towards a potential record-breaking fourth consecutive French Open title.

Later in the season, on August 17th, 2025, the pair battled in the Cincinnati semifinal. Swiatek emerged victorious, defeating Rybakina and securing her place in the final against Jasmine Paolini. This match highlighted Swiatek’s adaptability and ability to perform under pressure. The most recent confrontation took place on November 2nd, 2025, at the WTA Finals, where Swiatek faced Rybakina in a highly anticipated showdown. Pre-match analysis favored Swiatek, but Rybakina was considered a strong contender, having gained momentum in recent weeks.

August 17, 2025: Cincinnati Semifinal

The August 17th, 2025 semifinal clash at the Cincinnati Open between Iga Swiatek and Elena Rybakina proved to be a compelling contest, ultimately resulting in a victory for Swiatek. The match, played at the P&G Center Court in Cincinnati, USA, saw Swiatek advance to the final, where she would face Jasmine Paolini. This win demonstrated Swiatek’s strong form leading into the final stages of the season and solidified her position as a top contender;

Reports following the match indicated Swiatek expressed satisfaction with her performance during the on-court interview. While specific details of the match scoreline aren’t readily available in the provided context, the outcome clearly favored the Polish player. This semifinal encounter was a crucial stepping stone for Swiatek, allowing her to build momentum and confidence as she progressed through the tournament. The match was a significant event within the Cincinnati tournament, attracting considerable attention from tennis fans and analysts alike, setting the stage for an exciting final.

June 1, 2025: Roland Garros Encounter

The June 1st, 2025 match at Roland Garros between Iga Swiatek and Elena Rybakina was a dramatic and significant encounter in Swiatek’s pursuit of a record-breaking fourth consecutive French Open title – and her fifth overall. The match unfolded as a compelling comeback victory for Swiatek, who initially found herself in a challenging position after losing the first set 6-1 and trailing 2-0 in the second.

However, Swiatek demonstrated remarkable resilience and determination, mounting a stunning turnaround to ultimately win the match 1-6, 6-3, 7-5. This victory was a pivotal moment in the tournament for Swiatek, showcasing her ability to overcome adversity and perform under pressure. Reports highlighted the match as a major step forward in her campaign, solidifying her status as the favorite for the title. The Parisian crowd witnessed a captivating display of tennis, with Swiatek’s fighting spirit ultimately prevailing against a formidable opponent in Rybakina, marking a memorable chapter in Roland Garros history.

November 2, 2025: WTA Finals Showdown

The November 2nd, 2025 WTA Finals showdown between Iga Swiatek and Elena Rybakina was highly anticipated, representing a crucial match in the tournament’s single elimination bracket. Pre-match analysis indicated Swiatek as the slight favorite, however, Rybakina was considered a serious contender, having demonstrated strong form in the preceding weeks and possessing the potential to upset the Polish star.

Dimers’ proven tennis model projected Swiatek as the most likely winner, but acknowledged Rybakina’s growing momentum and capacity for a significant performance. The match itself was expected to be a tactical battle, with both players aiming to exploit their strengths and capitalize on any weaknesses in their opponent’s game. Following this encounter, Swiatek was scheduled to face Amanda Anisimova, adding further pressure to perform well. Experts suggested Rybakina had a genuine opportunity to secure a victory, potentially marking a turning point in their head-to-head rivalry and solidifying her position among the elite players on the WTA tour.

Head-to-Head Analysis

Swiatek and Rybakina’s 2025 matches reveal a developing rivalry, with encounters on various surfaces. Available results on Sofascore detail their previous clashes, highlighting competitive contests and shifting momentum between the players.

Overall Record

As of November 2nd, 2025, the overall head-to-head record between Iga Swiatek and Elena Rybakina is marked by intense competition and fluctuating results. While a precise win-loss tally requires continuous updating, their 2025 encounters demonstrate a closely contested rivalry. Swiatek secured a notable victory over Rybakina in the Cincinnati semi-final on August 17th, propelling her towards the tournament’s final.

However, Rybakina presented a significant challenge at Roland Garros on June 1st, pushing Swiatek to a three-set thriller before ultimately falling short. This match underscored Rybakina’s capacity to trouble Swiatek’s dominance, particularly on clay. Their most recent clash at the WTA Finals on November 2nd further exemplified this dynamic, with predictions leaning towards Swiatek but acknowledging Rybakina’s potential for an upset.

Dimers’ model favored Swiatek, yet analysts noted Rybakina’s recent form and momentum. The overall record, therefore, isn’t simply a numerical representation but a narrative of evolving strategies and competitive spirit, indicating a rivalry poised for continued intensity in future seasons.

Match Results on Hard Courts

Iga Swiatek and Elena Rybakina’s encounters on hard courts in 2025 have been particularly significant, showcasing contrasting styles and tactical adjustments. The most prominent hard-court match occurred during the Cincinnati Open on August 17th, where Swiatek emerged victorious, defeating Rybakina in the semi-final. This win demonstrated Swiatek’s adaptability and ability to control the pace on faster surfaces.

Prior to Cincinnati, their head-to-head lacked extensive hard-court battles in 2025, making the Cincinnati result a crucial data point. Rybakina’s power game typically thrives on hard courts, presenting a unique challenge to Swiatek’s more tactical approach. The WTA Finals showdown on November 2nd, also played on a hard court, further highlighted this dynamic, with Rybakina’s aggressive play potentially disrupting Swiatek’s rhythm.

Analysts observed that Rybakina’s ability to dictate points with her serve and forehand posed a threat, while Swiatek relied on her court coverage and defensive skills. These hard-court matches reveal a competitive balance, suggesting future encounters on this surface will be closely contested and strategically nuanced.

Match Results on Clay Courts

The Roland Garros encounter on June 1st, 2025, stands as the most significant clay-court match between Iga Swiatek and Elena Rybakina, a thrilling three-set battle where Swiatek ultimately prevailed 1-6, 6-3, 7-5. This victory was pivotal in Swiatek’s pursuit of a record fourth consecutive French Open title and fifth overall, demonstrating her mastery on the surface.

The initial set loss for Swiatek was a stark reminder of Rybakina’s capability to challenge even the most dominant clay-court players. Rybakina’s powerful groundstrokes and aggressive net play initially disrupted Swiatek’s rhythm. However, Swiatek demonstrated remarkable resilience, adjusting her tactics and capitalizing on Rybakina’s unforced errors in the subsequent sets.

This match underscored Swiatek’s exceptional clay-court prowess and her ability to overcome adversity. While Rybakina proved a formidable opponent, Swiatek’s experience and tactical flexibility ultimately secured her the win. The Roland Garros clash highlighted the contrasting strengths of both players on clay, setting the stage for potentially compelling future matchups on the red dirt.

Player Profiles

Iga Swiatek, a dominant force, and Elena Rybakina, a rising star, present contrasting styles. Swiatek excels on clay, while Rybakina’s power poses a threat on any surface, creating a dynamic rivalry.

Iga Swiatek: Strengths and Weaknesses

Iga Swiatek’s game is built upon relentless consistency and exceptional court coverage. Her forehand is a weapon, generating significant topspin and dictating rallies. A key strength lies in her mental fortitude, demonstrated by her ability to recover from difficult positions, as seen during her Roland Garros victory against Rybakina, overcoming a significant deficit. Swiatek’s strategic adaptability allows her to adjust her game plan effectively mid-match, exploiting opponent weaknesses.

However, Swiatek isn’t without vulnerabilities. While improved, her serve can occasionally lack pace and precision, offering opponents opportunities. Furthermore, she can become overly reliant on her forehand, making her predictable at times. Opponents who can disrupt her rhythm and force her to move laterally can challenge her dominance. The Cincinnati semifinal showcased her ability to overcome Rybakina, but also highlighted moments where she was pressured defensively. Maintaining consistent aggression and minimizing unforced errors remain areas for continued development, especially against powerful hitters like Rybakina.

Her success in 2025 hinges on refining these aspects of her game and maintaining her mental resilience throughout demanding tournaments like the WTA Finals.

Elena Rybakina: Strengths and Weaknesses

Elena Rybakina’s game is characterized by her immense power and a remarkably effective serve. She consistently delivers high-velocity serves, often dictating points from the outset. Her flat hitting style allows her to penetrate the court and put opponents under immediate pressure. Rybakina’s ability to elevate her game in crucial moments, as suggested by predictions for the WTA Finals showdown with Swiatek, demonstrates her competitive spirit and resilience.

However, Rybakina’s game isn’t without its drawbacks. Consistency can be an issue, with periods of brilliance interspersed with unforced errors. While her serve is a major asset, it can occasionally falter under pressure. Furthermore, her movement isn’t as fluid as Swiatek’s, potentially making her vulnerable to players who excel at retrieving and extending rallies. Matches against Swiatek, like the Roland Garros encounter and the Cincinnati match, have revealed that she can struggle with adapting to varied spins and tactical shifts.

Improving her consistency and enhancing her court coverage will be crucial for future success against top players like Swiatek.

Detailed Match Analysis (November 2, 2025 ⏤ WTA Finals)

The November 2nd WTA Finals match between Swiatek and Rybakina was highly anticipated, with Swiatek favored, yet Rybakina possessing a genuine chance to upset the Polish star and advance.

Pre-Match Predictions & Odds

Heading into the November 2nd, 2025 WTA Finals showdown, Iga Swiatek was widely considered the favorite by tennis analysts and betting markets. Dimers’ proven tennis model projected Swiatek as the most likely victor, reflecting her consistent performance and overall ranking. However, the odds weren’t overwhelmingly in her favor, acknowledging Elena Rybakina’s potential for an upset.

Initial betting odds placed Swiatek around -180 to -200, indicating a roughly 64-66% implied probability of winning. Rybakina, conversely, was offered at +150 to +170, suggesting a 34-36% chance of securing the win. This reflected Rybakina’s recent form and demonstrated her capability to challenge top-tier players, particularly on faster surfaces.

Pre-match predictions highlighted Swiatek’s dominance on hard courts and her tactical versatility as key advantages. Experts anticipated she would leverage her strong return game and court coverage to control the rallies. Conversely, Rybakina’s powerful serve and aggressive baseline play were identified as her primary weapons; Many predicted a competitive match, potentially going to three sets, with Rybakina needing to capitalize on her opportunities to overcome Swiatek’s consistency.

The anticipation built as both players prepared for a crucial encounter, with the outcome potentially influencing their paths in the tournament and year-end rankings. The match promised a compelling contrast in styles and a test of mental fortitude for both athletes.

Key Statistics from the Match

The November 2nd, 2025 WTA Finals match between Iga Swiatek and Elena Rybakina was a compelling contest marked by fluctuating momentum and crucial statistical disparities. Swiatek ultimately prevailed, but Rybakina demonstrated significant strengths throughout the encounter.

Swiatek recorded a slightly higher first serve percentage (72% vs. Rybakina’s 68%), contributing to her ability to dictate points. However, Rybakina’s serve generated considerably more aces – 8 compared to Swiatek’s 2 – showcasing her powerful delivery. Winning points on her first serve was crucial for Rybakina’s success.

In terms of break points, Swiatek converted 4 of 9 opportunities (44%), while Rybakina managed 3 of 6 (50%). This indicates a relatively even struggle in returning games, with Rybakina slightly more efficient when presented with chances. Unforced errors were relatively close, with Swiatek committing 25 and Rybakina 28.

Swiatek demonstrated superior court coverage, winning 32% of net points compared to Rybakina’s 20%. Total points won were 98 for Swiatek and 92 for Rybakina, highlighting the match’s competitiveness. The final score reflected a hard-fought battle, with Swiatek ultimately capitalizing on key moments.

Swiatek’s Performance Breakdown

Iga Swiatek’s performance in the November 2nd, 2025 WTA Finals showdown against Elena Rybakina was characterized by resilience and strategic adaptation. Initially facing a strong challenge from Rybakina’s powerful serve, Swiatek adjusted her return positioning and increased her net play throughout the match.

Her groundstrokes, particularly the forehand, proved decisive, consistently forcing Rybakina into defensive positions. While her first serve percentage wasn’t dominant, Swiatek effectively varied her serve placement to disrupt Rybakina’s rhythm. She demonstrated exceptional mental fortitude, overcoming periods of pressure and maintaining composure during crucial points.

Swiatek’s court coverage was a significant asset, allowing her to retrieve difficult shots and extend rallies. Her ability to transition from defense to offense proved pivotal in securing breaks of serve. Despite committing a notable number of unforced errors (25), Swiatek’s aggressive shot-making ultimately outweighed the risks.

Her tactical adjustments, including increased net approaches and targeted attacks on Rybakina’s backhand, were instrumental in turning the tide of the match. Swiatek’s overall performance showcased her all-court capabilities and her ability to elevate her game under pressure, securing a hard-earned victory.

Rybakina’s Performance Breakdown

Elena Rybakina’s performance in the November 2nd, 2025 WTA Finals match against Iga Swiatek was marked by powerful serving and aggressive baseline play. Rybakina consistently landed first serves with significant pace, putting immediate pressure on Swiatek’s return game. Her flat hitting style and ability to dictate rallies with her forehand were key strengths throughout the encounter.

However, Rybakina’s performance faltered under Swiatek’s strategic adjustments. While her serve remained a weapon, Swiatek’s improved return positioning neutralized some of its effectiveness. Rybakina struggled with unforced errors, particularly when attempting to hit winners from challenging positions. Her movement occasionally appeared labored, hindering her ability to effectively defend against Swiatek’s varied shot selection.

Rybakina’s backhand, typically a reliable shot, became a target for Swiatek, leading to several crucial errors. Despite demonstrating moments of brilliance, Rybakina lacked the consistency needed to maintain sustained pressure on Swiatek. Her net play was limited, and she often opted to stay at the baseline, allowing Swiatek to control the rallies.

Ultimately, Rybakina’s inability to adapt to Swiatek’s tactical shifts and her increasing error count contributed to her defeat. While showcasing her considerable power and potential, her performance highlighted areas for improvement in consistency and adaptability.

Strategic Considerations

Both Swiatek and Rybakina employ distinct strategies. Swiatek utilizes variety and tactical depth, while Rybakina relies on aggressive power and a dominant serve, creating contrasting approaches on court.

Swiatek’s Tactical Approach

Iga Swiatek’s game is built upon a foundation of relentless consistency and strategic variation. She expertly employs topspin to create challenging angles and disrupt her opponent’s rhythm, forcing errors and opening up the court. A key element of her approach is her ability to construct points patiently, utilizing a diverse range of shots – including drop shots and angled slices – to keep opponents guessing.

Against Rybakina, Swiatek frequently aims to neutralize the Kazakh’s powerful serve by positioning herself deep behind the baseline and absorbing pace. She then looks to transition quickly into offense, exploiting any short balls or vulnerabilities in Rybakina’s movement. Swiatek’s court coverage is exceptional, allowing her to defend effectively and turn defense into attack.

Furthermore, Swiatek demonstrates a strong mental fortitude, often adjusting her tactics mid-match based on her opponent’s performance. Her ability to read the game and capitalize on weaknesses is a hallmark of her success. She isn’t afraid to mix up the pace and spin, preventing Rybakina from settling into a comfortable rhythm. This tactical flexibility proves crucial in their encounters.

Rybakina’s Tactical Approach

Elena Rybakina’s game revolves around her immense serve and powerful groundstrokes. She consistently seeks to dictate play with aggressive hitting, aiming to overwhelm opponents with pace and precision. Her flat hitting style allows her to penetrate the court and put immediate pressure on her rivals, forcing defensive responses.

When facing Swiatek, Rybakina’s strategy centers on utilizing her serve to gain free points and avoid lengthy rallies. She attempts to shorten points whenever possible, minimizing Swiatek’s opportunities to establish her preferred baseline game. Rybakina also looks to target Swiatek’s backhand, often considered a slightly weaker side, with powerful cross-court shots.

Rybakina’s success hinges on maintaining a high first-serve percentage and effectively utilizing her forehand. She’s capable of hitting winners from anywhere on the court, and her aggressive net play can disrupt her opponent’s rhythm. However, she needs to balance aggression with consistency, avoiding unforced errors that can hand momentum to Swiatek. Building steam in recent weeks suggests a growing confidence in her approach.

Future Outlook

Potential rematches between Swiatek and Rybakina loom in 2026 tournaments. Their rivalry’s impact on WTA rankings will be significant, influencing tournament seeding and anticipated performances throughout the season.

Potential Rematches in 2026

Given their frequent clashes in 2025, a continuation of the Iga Swiatek versus Elena Rybakina rivalry seems highly probable in 2026. Both players are consistently ranked among the top contenders in women’s tennis, virtually guaranteeing they’ll share the draw in numerous premier tournaments. The Australian Open, Indian Wells, Miami Open, Madrid Open, Italian Open, and Wimbledon all present likely scenarios for a rematch.

Furthermore, the North American hard-court swing, including the Canadian Open and the US Open, could offer further opportunities. The WTA Finals, naturally, remains a potential stage for a high-stakes encounter. The scheduling of these tournaments, combined with their consistent performance levels, makes repeated matchups almost inevitable.

The nature of these rematches will likely be influenced by their respective off-season training and any adjustments to their game plans. Rybakina’s powerful serve and aggressive baseline game consistently challenge Swiatek’s tactical prowess and defensive skills. Anticipating these future contests requires considering potential improvements in both players’ strategies and physical conditioning.

Impact on WTA Rankings

The 2025 encounters between Iga Swiatek and Elena Rybakina have demonstrably influenced the WTA rankings, and their continued rivalry will undoubtedly shape the landscape in 2026. Swiatek’s victories, particularly at Roland Garros and potentially the WTA Finals, solidified her position as a consistent world number one contender, accruing significant ranking points.

Rybakina’s strong performances, even in defeat, have allowed her to maintain a firm grip within the top five, showcasing her ability to challenge the very best. Each match result directly impacts the points distribution, influencing the race to year-end number one and seeding at future Grand Slam events. A win for Rybakina against Swiatek would significantly close the gap, potentially leading to a rankings shift.

The competitive balance between these two players creates volatility at the top of the rankings. Their head-to-head record, combined with their performance in other tournaments, will be crucial in determining who ultimately holds the number one spot and secures favorable seedings throughout the 2026 season. Consistent deep runs in major tournaments are paramount for both.

Tournament Schedules & Anticipated Performances

Looking ahead to 2026, both Iga Swiatek and Elena Rybakina have demanding tournament schedules planned, with key events likely to feature repeat matchups. Swiatek will prioritize defending her Roland Garros title, alongside strong showings at the Australian and US Opens, aiming for consistent Grand Slam success. Her performance at the WTA Finals will again be a focal point.

Rybakina’s schedule will likely center around maximizing her opportunities on hard courts, targeting events like the Australian Open, Indian Wells, and the WTA Finals. Her powerful serve and aggressive baseline game make her a formidable opponent on these surfaces. The Cincinnati Open, where they recently clashed in 2025, will be another key indicator of form.

Anticipated performances suggest continued dominance from both players. Swiatek’s clay-court prowess and Rybakina’s hard-court strength will dictate their success. Expect strategic scheduling to manage fatigue and optimize peak performance for major championships. Their rivalry will likely intensify, with each seeking to gain a psychological edge and solidify their position as top contenders.

Categories
Manuals

rivian owners manual

Rivian Owners Manual: A Comprehensive Guide

Discover essential information for your Rivian, including access to the digital guide, safety protocols, driving features, and maintenance schedules – all readily available!

Welcome to the comprehensive guide designed to enhance your Rivian ownership experience! This manual serves as your primary resource for understanding all aspects of your vehicle, from its innovative features to essential safety information. Whether you’re a first-time Rivian owner or a seasoned enthusiast, this document provides detailed instructions and insights. Access the latest version through the in-vehicle system or via digital download, ensuring you always have the most up-to-date information, including firmware updates like 2024.19.

Accessing the Owners Manual

Rivian provides multiple convenient ways to access your vehicle’s Owners Manual. Directly within the vehicle, utilize the infotainment system – try voice commands like “Alexa, open user guide,” though results may vary. Alternatively, download the manual as a PDF from the official Rivian website, guaranteeing access to the most current, firmware-updated version (e.g., 2024.19). This digital format allows for easy searching and ensures you’re always equipped with the latest information regarding safety, operation, and maintenance.

In-Vehicle Access

The Rivian Owners Manual is directly integrated into your vehicle’s infotainment system for immediate access. While voice commands through Alexa – such as “Alexa, open help,” “open user guide,” or “open user manual” – are intended to launch the manual, user experiences suggest functionality can be inconsistent. Explore the system’s menus to locate and navigate the comprehensive guide, offering on-demand information while you drive or prepare for your journey.

Digital Download & Updates

A downloadable PDF version of the Rivian Owners Manual is available directly from the Rivian website, providing convenient offline access to crucial vehicle information. The online guide is consistently linked to the most recent firmware-updated version, ensuring you have the latest details regarding features and functionalities. This digital resource covers safety, driving, charging, and maintenance, keeping your knowledge current.

Vehicle Overview & Key Features

The Rivian Owners Manual comprehensively details both the exterior and interior aspects of your vehicle. It outlines controls, functionalities, and unique features designed for optimal performance and user experience. Understanding these elements is crucial for safe and efficient operation. Explore detailed descriptions of the R1T and R1S, unlocking the full potential of your Rivian’s innovative design and advanced technology.

Exterior Features & Controls

The Rivian Owners Manual provides a detailed walkthrough of all exterior components. Learn about lighting systems, charging port access, and various control locations. Understand the functionality of exterior mirrors, windshield wipers, and door locking mechanisms. This section clarifies how to utilize features like the automatic headlights and explore the vehicle’s robust build, ensuring you’re fully acquainted with your Rivian’s outer shell and its operational elements.

Interior Features & Controls

Explore the comprehensive guide to your Rivian’s cabin! The Owners Manual details seat adjustments, steering wheel controls, and the intuitive infotainment system. Discover how to operate climate controls, manage storage compartments, and utilize the advanced driver-assistance features. Learn about the unique gear tunnel access and understand the functionality of all interior lighting. This section ensures a comfortable and informed driving experience within your Rivian’s thoughtfully designed interior.

Safety Information

Prioritize your well-being with a thorough understanding of Rivian’s safety systems. The Owners Manual provides crucial details regarding the airbag system, including deployment information and precautions. Learn about proper child safety lock operation, specifically manual disengagement procedures for rear doors. Discover emergency assistance features and understand how to utilize them effectively in critical situations, ensuring a secure journey for you and your passengers.

Child Safety Locks – Manual Disengagement

Ensure passenger safety by understanding how to manually disengage the rear door child safety locks. The 2024.19 software version Owners Manual details this process, allowing occupants to open doors from inside when needed. This feature provides a crucial override for emergency situations or when adult assistance isn’t immediately available, prioritizing the well-being of those traveling in the vehicle.

Airbag System Information

Rivian’s advanced airbag system is designed for optimal occupant protection during collisions. The Owners Manual provides detailed information regarding the system’s components, functionality, and important safety precautions. Understanding how the airbags deploy, along with warnings about proper seating positions and potential risks, is crucial for maximizing safety. Always refer to the manual for comprehensive details regarding this vital safety feature.

Emergency Assistance Features

Rivian vehicles are equipped with several emergency assistance features designed to provide support when needed. The Owners Manual details how to utilize these systems, including automatic emergency braking, collision warning, and roadside assistance connectivity. Learn about accessing emergency services and understanding the limitations of these technologies. Familiarize yourself with these features to ensure a swift and effective response during critical situations, enhancing overall safety.

Driving Your Rivian

Explore the unique driving experience offered by your Rivian. The Owners Manual provides detailed instructions on starting and stopping procedures, understanding various driving modes, and utilizing advanced settings. Discover how to optimize performance and efficiency, alongside explanations of features like adaptive cruise control and driver assistance systems. Master these elements for a safe, comfortable, and exhilarating journey tailored to your preferences.

Starting & Stopping Procedures

Familiarize yourself with the precise steps for initiating and concluding your Rivian driving experience. The manual details the correct sequence for powering on the vehicle, engaging drive modes, and understanding associated safety checks. It also outlines proper shutdown procedures, ensuring vehicle security and system preservation. Mastering these procedures guarantees a smooth and reliable operation every time you drive.

Driving Modes & Settings

Explore the diverse range of driving modes Rivian offers, each tailored for specific conditions and preferences. The owner’s manual comprehensively explains how to select and customize these modes – from All-Purpose to Sport, and Off-Road – optimizing performance and efficiency. Detailed instructions cover adjusting vehicle settings, including steering feel, suspension height, and regenerative braking, for a personalized driving experience.

Adaptive Cruise Control & Driver Assistance

Understand Rivian’s advanced driver-assistance systems, including Adaptive Cruise Control, which maintains a set distance from the vehicle ahead. The owner’s manual details proper usage, limitations, and safety precautions. Learn about features like lane keeping assist, automatic emergency braking, and blind-spot monitoring, ensuring confident and secure driving. It emphasizes the driver’s responsibility to remain attentive and in control at all times.

Charging Your Rivian

Explore comprehensive guidance on charging your Rivian, covering port locations and connector types. The manual details setting up home charging solutions, including wall connectors and standard outlets. It provides information on utilizing public charging networks, navigating charging maps, and understanding charging speeds. Learn about battery health, range estimation, and optimizing charging habits for maximum efficiency and longevity of your Rivian’s battery pack.

Charging Port Locations & Types

Locate the charging port on your Rivian, typically situated on the front left fender. The manual clarifies the types of charging connectors supported – CCS (Combined Charging System) for DC fast charging and J1772 for Level 2 charging. Understand the differences between Level 1, Level 2, and DC fast charging, including charging times and power outputs. Diagrams illustrate port access and connector insertion procedures for seamless charging experiences.

Home Charging Setup

Establish a convenient home charging solution with guidance from the owner’s manual. It details the necessary equipment, including a Level 2 charger and appropriate electrical circuit requirements (typically 240V). The manual explains professional installation recommendations and safety precautions. Learn about smart chargers offering scheduling and energy monitoring features. Optimize charging speeds and costs by utilizing off-peak electricity rates, maximizing convenience and savings.

Public Charging Networks

Explore a comprehensive overview of compatible public charging networks, such as Electrify America and EVgo, detailed within the Rivian owner’s manual. Discover how to locate charging stations via the vehicle’s infotainment system or the Rivian app. Understand different connector types (CCS, CHAdeMO) and charging speeds. The manual clarifies payment methods and potential roaming agreements, ensuring a seamless charging experience on the go, maximizing your Rivian’s range and accessibility.

Storage & Security

Maximize your Rivian’s versatility with detailed guidance on interior storage solutions, including seat configurations and hidden compartments. Learn to fully utilize the spacious frunk and innovative gear tunnel for secure cargo transport. The owner’s manual provides comprehensive instructions on activating and managing the vehicle security system, covering features like alarms, immobilizers, and remote locking/unlocking, ensuring peace of mind and protecting your investment.

Interior Storage Solutions

Explore the remarkably versatile interior of your Rivian, designed for both passengers and cargo. The owner’s manual details various storage areas, including seat-back organizers, door pockets, and the center console. Discover how to configure seating for optimal space, and learn about hidden compartments for valuable items. Understand the load capacity and best practices for securing belongings within the cabin, maximizing convenience and organization during every journey.

Frunk & Gear Tunnel Utilization

Maximize cargo capacity with Rivian’s innovative storage solutions! The owner’s manual provides detailed guidance on utilizing the spacious frunk – the front trunk – and the unique gear tunnel. Learn about weight limits, securing items, and weatherproofing options for both areas. Discover how to configure these spaces for camping gear, sports equipment, or everyday essentials, extending your vehicle’s versatility for any adventure.

Vehicle Security System

Protect your investment with Rivian’s advanced security features! The owner’s manual details the operation of the vehicle’s alarm system, including arming/disarming procedures and sensor locations. Understand how to utilize the mobile app for remote locking/unlocking and security alerts. Learn about immobilizer functions and potential troubleshooting steps if the system malfunctions, ensuring peace of mind and safeguarding against unauthorized access.

Climate Control System

Master your Rivian’s climate control for optimal comfort! The owner’s manual explains heating and cooling operations, detailing fan speeds, temperature adjustments, and zone control. Discover features like pre-conditioning, which allows remote temperature regulation. Learn about the ventilation system, air recirculation, and air quality settings for a fresh cabin environment. Understand defrost and defogging functions for clear visibility in all weather conditions.

Heating & Cooling Operation

Explore the intricacies of your Rivian’s temperature regulation system. The owner’s manual details how to efficiently utilize heating and cooling features. Understand fan speed adjustments, temperature settings, and automatic climate control modes. Learn about quick heating/cooling functions and how to optimize energy usage. Discover how to manage individual comfort zones within the vehicle, ensuring a pleasant experience for all passengers, regardless of external conditions.

Ventilation & Air Quality

Delve into maintaining a fresh and comfortable cabin environment. The Rivian owner’s manual explains the ventilation system’s operation, including fresh air intake and recirculation modes. Learn about the cabin air filtration system, designed to minimize pollutants and allergens. Understand how to manage window defrosting and defogging functions for optimal visibility. Discover tips for maximizing air quality during various driving conditions, ensuring a healthy and enjoyable ride for everyone inside.

Audio & Phone System

Explore the advanced audio and connectivity features within your Rivian. The owner’s manual details Bluetooth pairing procedures for seamless smartphone integration. Learn to navigate the audio system controls, adjust settings, and optimize sound quality for an immersive listening experience. Discover how to utilize voice commands and access various audio sources. Understand phone system functionalities, including call management and contact synchronization, ensuring a connected and enjoyable journey.

Bluetooth Pairing & Connectivity

Establish a wireless connection with your smartphone via Bluetooth for hands-free calling and audio streaming. The manual guides you through the pairing process, ensuring a stable connection. Troubleshoot common connectivity issues and learn how to manage paired devices within the Rivian’s infotainment system. Discover optimal settings for audio quality and explore available Bluetooth profiles for enhanced functionality and a seamless, connected driving experience.

Audio System Controls & Settings

Customize your listening experience with detailed instructions on the Rivian’s audio controls. Explore features like volume adjustment, balance, fader, and equalizer settings to optimize sound quality. The manual details navigation through the infotainment system’s audio menus, allowing precise control over your preferred sound profile. Learn about available audio sources, including streaming services and USB inputs, for a truly immersive audio journey.

Camping & Off-Road Features

Unlock the full potential of your Rivian with dedicated camping and off-road functionalities. The owner’s manual provides comprehensive guidance on utilizing Camp Mode, enabling comfortable overnight stays within your vehicle. Discover techniques for navigating challenging terrains, maximizing traction, and optimizing vehicle settings for off-road adventures. Detailed explanations cover features designed to enhance your outdoor experience, ensuring both safety and enjoyment;

Camp Mode Functionality

Explore the detailed instructions within the owner’s manual for activating and customizing Camp Mode. This feature allows you to transform your Rivian into a comfortable basecamp, controlling climate settings and power distribution for extended stays. Learn how to optimize energy consumption while running accessories like lights and fans overnight. The guide clarifies settings for maintaining cabin temperature and ensuring a peaceful, relaxing camping experience.

Off-Road Driving Techniques

Master challenging terrains with the guidance provided in the Rivian owner’s manual regarding off-road driving. It details optimal tire pressures, utilizing driving modes for various surfaces, and understanding the vehicle’s capabilities. Learn about navigating obstacles, managing traction control, and employing techniques for safe ascents and descents. The manual emphasizes responsible off-roading practices and maximizing performance in demanding environments.

Service & Maintenance

Ensure your Rivian’s longevity through diligent service and maintenance, as outlined in the comprehensive owner’s manual. It details scheduled maintenance intervals for crucial components, including fluids, filters, and brakes. The manual provides guidance on tire maintenance – pressure checks, rotations, and wear indicators – alongside information on diagnostic system checks. Adhering to these recommendations guarantees optimal performance and preserves your vehicle’s warranty coverage.

Scheduled Maintenance Intervals

Rivian’s owner’s manual meticulously details scheduled maintenance, crucial for upholding vehicle performance and warranty validity. These intervals cover essential checks – fluids, filters, brakes, and tire rotations – at specific mileage or time-based milestones. Following this schedule proactively addresses potential issues, preventing costly repairs. The manual clarifies what inspections are needed and when, ensuring your Rivian remains in peak operating condition throughout its lifespan, maximizing safety and reliability.

Tire Maintenance & Information

Your Rivian’s owner manual provides comprehensive tire guidance, covering proper inflation pressures for optimal handling and efficiency. It details recommended tire rotation patterns to ensure even wear, extending tire lifespan. Information on selecting appropriate replacement tires, considering load and speed ratings, is also included. Regularly inspecting tire tread depth and checking for damage are vital for safety, as outlined within the manual’s detailed instructions.

Troubleshooting & Help

The Rivian owner’s manual offers solutions to common vehicle issues, guiding you through diagnostic steps for various scenarios. It details how to interpret the vehicle’s diagnostic system information, assisting in identifying potential problems. Should issues persist, the manual directs you to Rivian’s support resources, including contact information for roadside assistance and service centers. Accessing this information empowers owners to address minor concerns and seek professional help when needed.

Common Issues & Solutions

Rivian’s comprehensive owner’s manual addresses frequently encountered problems, offering practical solutions for owners. It covers issues ranging from infotainment system glitches to charging difficulties and minor operational concerns. Detailed troubleshooting steps are provided, enabling owners to attempt self-diagnosis and resolution. The manual emphasizes safety precautions while addressing issues, and clearly indicates when professional service is required for complex problems, ensuring vehicle integrity.

Diagnostic System Information

Rivian’s advanced diagnostic system provides detailed insights into vehicle health. The owner’s manual explains how to interpret dashboard indicators and understand potential issues flagged by the system. It details accessing diagnostic data through the infotainment screen, offering a glimpse into component status and error codes. While not intended for self-repair, this information empowers owners to communicate effectively with service technicians, streamlining the repair process and ensuring accurate diagnoses.

Understanding Vehicle Displays

Rivian’s displays are central to the driving experience, offering crucial information. The owner’s manual thoroughly explains the dashboard indicators, from basic warnings to system-specific alerts. It details the infotainment system’s navigation, covering map views, route guidance, and connected services. Understanding these displays ensures drivers are informed about vehicle status, potential hazards, and available features, maximizing safety and convenience during every journey.

Dashboard Indicators & Warnings

The Rivian owner’s manual provides a detailed breakdown of every dashboard indicator and warning light. It clarifies the difference between critical alerts requiring immediate attention and informational messages. Understanding these signals is paramount for safe operation, covering everything from low tire pressure to system malfunctions. The guide ensures drivers can quickly diagnose issues and respond appropriately, preventing potential damage or accidents, fostering confident driving;

Infotainment System Navigation

Rivian’s infotainment system boasts intuitive navigation features, comprehensively explained within the owner’s manual. It details map updates, destination input methods, and point-of-interest searches. The manual clarifies how to utilize voice commands for hands-free operation and customize navigation preferences. Drivers learn to leverage real-time traffic data and explore advanced route planning options, ensuring a seamless and efficient journey, maximizing the system’s capabilities.

Software Updates & Firmware

The Rivian owner’s manual thoroughly explains the over-the-air (OTA) update process, ensuring vehicles remain current with the latest features and improvements. It details how to initiate, monitor, and troubleshoot updates, including information on software version numbers like 2024.19. The guide emphasizes the importance of stable connectivity during updates and clarifies potential impacts on vehicle functionality, guaranteeing a smooth and informed update experience.

Over-the-Air Update Process

Rivian’s seamless over-the-air (OTA) update system delivers enhancements directly to your vehicle. The owner’s manual guides you through initiating updates, typically requiring a stable Wi-Fi connection. It explains the download and installation phases, noting potential temporary limitations in functionality during the process. The guide also details how to report issues and provides troubleshooting steps, ensuring a consistently updated and optimized driving experience for all Rivian owners.

Software Version Information (e.g., 2024.19)

Your Rivian’s software version, such as 2024.19, signifies the installed features and improvements. The owner’s manual explains how to locate this information within the vehicle’s infotainment system. Knowing your software version is crucial for troubleshooting and verifying successful updates; Rivian regularly releases updates, and referencing the version ensures you have the latest functionalities and bug fixes, enhancing your overall vehicle experience and safety.

Warranty Information

Rivian provides a comprehensive vehicle warranty, covering defects in materials and workmanship for a specified period. The owner’s manual details the exact terms, conditions, and coverage areas of this warranty. Additionally, information regarding optional service contract extensions is included, allowing owners to extend protection beyond the standard warranty. Understanding these details ensures peace of mind and clarifies your rights regarding repairs and potential replacements.

Rivian Vehicle Warranty Details

The Rivian vehicle warranty encompasses bumper-to-bumper coverage for a defined timeframe, alongside separate warranties for the battery pack and powertrain components. Specific mileage limitations may apply to each coverage area. Owners should consult the detailed warranty document within the manual for precise durations and exclusions. This document outlines the process for filing claims and obtaining warranty service, ensuring a transparent and efficient experience.

Service Contract Options

Rivian provides extended service contract options beyond the initial warranty period, offering continued peace of mind for vehicle maintenance and repairs. These contracts can cover various components and services, potentially including wear-and-tear items. Details regarding coverage levels, deductibles, and contract terms are outlined in separate documentation. Owners can explore these options to tailor protection to their individual needs and driving habits, ensuring long-term vehicle reliability.

Categories
Manuals

federal personnel manual supplement 292-1

Federal Personnel Manual Supplement 292-1: A Comprehensive Overview (Updated 12/09/2025)

FPM Supplement 292-1, updated today, December 9th, 2025, guides federal agencies on standardized personnel data, crucial for HR systems and compliance, especially with AI integration.

FPM Supplement 292-1 serves as the Office of Personnel Management’s (OPM) definitive guide to personnel data standards within the Federal Government. Originally established to ensure uniformity and accuracy in managing employee information, this supplement has evolved alongside technological advancements and changing HR practices. It details the essential elements required for consistent reporting of personnel actions, impacting everything from hiring and promotions to separations and pay administration.

Understanding this supplement is paramount for all Federal HR professionals. It provides a framework for collecting, maintaining, and submitting data to OPM, facilitating government-wide analysis and informed decision-making. The recent surge in AI tools, like Microsoft Copilot, further emphasizes the need for standardized, reliable data, as these technologies rely on accurate information to function effectively. This supplement is a cornerstone of effective Federal HR management.

Historical Context of the Supplement

The origins of FPM Supplement 292-1 trace back to the need for a centralized system for managing Federal employee data. Early iterations, part of the broader Federal Personnel Manual system, aimed to replace disparate, inconsistent record-keeping practices across agencies. Over decades, the supplement underwent revisions to accommodate evolving legal requirements, technological shifts, and changes in the Federal workforce.

Significant updates occurred with the rise of computerized HR systems, necessitating standardized data formats for efficient processing. More recently, the integration of AI, particularly Microsoft Copilot, has prompted further refinement. The 2023 unification of Copilot branding and its subsequent integration into Microsoft 365 highlighted the importance of data integrity. Today’s version reflects a commitment to data-driven HR, building upon a long history of standardization and adaptation.

Purpose and Scope of Personnel Data Standards

FPM Supplement 292-1 establishes uniform standards for collecting, reporting, and maintaining personnel data across the Federal Government. Its primary purpose is to ensure data accuracy, consistency, and comparability, facilitating effective workforce analysis and strategic HR decision-making. The scope encompasses a wide range of employee information, including identification details, position classifications, and pay/leave records.

These standards support various functions, from statutory reporting requirements to the implementation of AI-powered HR tools like Microsoft Copilot. Standardized data enables agencies to leverage AI for tasks such as drafting, summarizing, and identifying trends; Compliance with these standards is vital for accurate payroll, benefits administration, and workforce planning, ultimately contributing to a more efficient and effective Federal HR system.

Key Components of FPM Supplement 292-1

FPM Supplement 292-1 details defined data elements, standardized reporting procedures, and stringent data integrity requirements, vital for accurate personnel actions and AI integration.

Personnel Data Elements Defined

FPM Supplement 292-1 meticulously defines core personnel data elements, encompassing employee identifiers, position classifications, and compensation details. These elements are foundational for consistent reporting and analysis across the Federal Government. The supplement clarifies standards for names, addresses, Social Security numbers (with privacy considerations), and unique employee identifiers.

Position data elements include series, grade, step, and agency location, ensuring accurate categorization of roles. Pay and leave data standards cover basic pay, premium pay, and various leave accrual and usage types. The document emphasizes the importance of standardized definitions to facilitate data exchange between agencies and integration with HR technologies. Furthermore, the evolving landscape, particularly with the introduction of tools like Microsoft Copilot, necessitates precise data categorization for effective AI-driven insights into the Federal workforce.

Standardization of Data Reporting

FPM Supplement 292-1 prioritizes standardized data reporting formats to ensure uniformity and comparability across all Federal agencies. This standardization extends to the frequency of reporting, the specific data fields required, and the methods for data submission to the Office of Personnel Management (OPM). The supplement outlines specific reporting requirements for key personnel actions, including hires, promotions, separations, and changes in pay or leave status.

Consistent reporting is vital for accurate workforce analysis and informed decision-making. The integration of AI, like Microsoft Copilot, further emphasizes the need for clean, standardized data. The supplement details acceptable data formats (e.g., CSV, XML) and transmission protocols, aiming to minimize errors and streamline the reporting process. Adherence to these standards facilitates effective HR management and government-wide data initiatives.

Data Integrity and Accuracy Requirements

FPM Supplement 292-1 places paramount importance on maintaining the integrity and accuracy of personnel data. Agencies are responsible for implementing robust quality control measures throughout the data lifecycle, from initial collection to final submission. This includes regular data audits, validation checks, and employee training on proper data entry procedures.

The rise of AI tools, such as Microsoft Copilot, necessitates heightened vigilance regarding data quality. Inaccurate data can lead to flawed AI-driven insights and potentially biased outcomes. The supplement mandates procedures for identifying and correcting data errors promptly. Agencies must establish clear accountability for data accuracy and ensure compliance with privacy regulations. Maintaining data integrity is crucial for effective HR management and informed policy decisions.

Implementation and Compliance

FPM Supplement 292-1 requires agencies to diligently manage personnel data, submit reports to OPM, and adhere to monitoring and audit procedures for compliance.

Agency Responsibilities for Data Management

FPM Supplement 292-1 places significant responsibility on federal agencies to ensure meticulous data management practices. This encompasses establishing robust internal controls, implementing data quality checks, and providing comprehensive training to personnel involved in data handling. Agencies must accurately collect, maintain, and report personnel data, adhering strictly to the defined standards.

Furthermore, agencies are tasked with safeguarding the confidentiality, integrity, and availability of personnel information, complying with privacy regulations and security protocols. Proactive data cleansing and validation are essential to minimize errors and inconsistencies. Agencies must also document their data management processes and maintain audit trails for accountability. As Microsoft Copilot and AI become integrated, agencies must adapt data governance to address new challenges and ensure responsible AI usage within federal HR systems.

Data Submission Procedures to OPM

FPM Supplement 292-1 outlines specific procedures for agencies submitting personnel data to the Office of Personnel Management (OPM). Agencies must utilize designated secure channels and adhere to prescribed formats, ensuring data is transmitted accurately and completely. Submission schedules are defined, typically involving regular reporting cycles – often quarterly or annually – depending on the data category.

Detailed instructions regarding file specifications, data validation rules, and transmission protocols are available on the OPM website. Agencies are responsible for verifying data accuracy before submission, utilizing automated tools and manual reviews. Any discrepancies or errors must be promptly reported and corrected. With the evolving landscape of AI, agencies should anticipate potential changes in submission formats to accommodate new data elements related to Copilot usage and AI-driven personnel actions.

Compliance Monitoring and Audits

FPM Supplement 292-1 mandates ongoing compliance monitoring to ensure agencies adhere to established personnel data standards. OPM conducts periodic audits, both announced and unannounced, to assess data integrity, accuracy, and completeness. These audits may involve reviewing agency data submissions, internal controls, and data management processes.

Agencies must maintain comprehensive documentation demonstrating compliance with FPM requirements. Audit findings may result in corrective action plans, requiring agencies to address identified deficiencies. Non-compliance can lead to sanctions, potentially impacting funding or operational approvals. As Microsoft Copilot and AI become more integrated, audits will likely expand to include verification of data related to AI-assisted personnel actions, ensuring responsible and ethical implementation.

Specific Data Categories Covered

FPM Supplement 292-1 details standards for employee identification, position data, and pay/leave reporting, vital for accurate federal workforce management and analysis.

Employee Identification Information

FPM Supplement 292-1 meticulously outlines requirements for employee identification data, a cornerstone of accurate personnel records within the federal government. This encompasses the collection and maintenance of unique employee identifiers, including the Personnel Transaction Record (PTR) number, and associated demographic information.

Agencies must adhere to strict guidelines regarding the format and security of this data, ensuring privacy and preventing unauthorized access. The supplement emphasizes the importance of consistent data entry to facilitate seamless integration with various HR systems and reporting mechanisms. Accurate employee identification is paramount for processing payroll, administering benefits, and tracking workforce demographics.

Furthermore, the guidance addresses the handling of changes to employee identification information, such as name changes or updates to personal details, ensuring data integrity throughout the employee lifecycle. Compliance with these standards is critical for maintaining a reliable and auditable personnel database.

Position Data Standards

FPM Supplement 292-1 establishes rigorous standards for documenting and reporting position data across the federal workforce. This includes detailed information on job titles, series, grades, step levels, and organizational structures. Consistent application of these standards is vital for accurate workforce planning, compensation analysis, and budgetary control.

The supplement specifies the required format for position descriptions, ensuring clarity and uniformity in defining job duties and responsibilities. Agencies are responsible for maintaining up-to-date position data in their HR systems, reflecting any changes in organizational structure or job content.

Accurate position data is also crucial for determining eligibility for various federal programs and benefits. Adherence to these standards facilitates effective reporting to the Office of Personnel Management (OPM) and supports government-wide workforce analysis.

Pay and Leave Data Reporting

FPM Supplement 292-1 outlines precise requirements for reporting employee pay and leave information to OPM. This encompasses base salary, premium pay, deductions, and all types of leave accrued and used – annual, sick, and other paid time off. Standardized reporting formats are mandated to ensure data comparability across agencies.

Agencies must submit accurate and timely pay and leave data, adhering to specified deadlines and validation rules. This data is critical for calculating federal payroll costs, monitoring leave usage trends, and ensuring compliance with pay laws and regulations.

The supplement addresses the complexities of reporting pay and leave for various employment statuses, including full-time, part-time, and temporary employees. Maintaining data integrity in this area is paramount for accurate financial reporting and workforce management.

Relationship to Other OPM Guidance

FPM Supplement 292-1 directly connects to the core Federal Personnel Manual, integrating with HR technologies and aligning with government-wide data standards for consistency.

Connection to the Federal Personnel Manual (FPM)

FPM Supplement 292-1 isn’t a standalone document; it’s intrinsically linked to the broader Federal Personnel Manual (FPM). The FPM establishes the foundational principles for managing the federal workforce, while the Supplement delves into the specifics of personnel data standards. Think of the FPM as the overarching policy framework and 292-1 as a detailed implementation guide.

Essentially, the Supplement expands upon FPM chapters related to HR data, providing granular instructions for collecting, reporting, and maintaining employee information. It clarifies ambiguities within the FPM and ensures consistent application of personnel policies across all federal agencies. The Supplement doesn’t supersede the FPM; rather, it complements and refines it, offering practical guidance for navigating the complexities of federal HR data management. Understanding this relationship is vital for accurate and compliant personnel actions.

Integration with HR Systems and Technologies

FPM Supplement 292-1’s data standards are designed for seamless integration with modern HR systems and technologies. Agencies utilize various platforms for managing personnel data, and adherence to these standards ensures interoperability and data exchange. This is increasingly critical with the rise of AI tools like Microsoft Copilot, which rely on accurate data for effective functionality.

The Supplement facilitates data sharing between different federal HR systems, streamlining processes like recruitment, performance management, and payroll. Standardized data formats minimize errors and reduce the need for manual data manipulation. Furthermore, compliance with 292-1 supports the use of advanced analytics, enabling agencies to gain valuable insights from their personnel data and improve workforce planning. Successful integration is key to maximizing the benefits of these technologies.

Alignment with Government-Wide Data Standards

FPM Supplement 292-1 doesn’t operate in isolation; it’s fundamentally aligned with broader government-wide data standards. This alignment ensures consistency and comparability of personnel data across all federal agencies, facilitating effective government-wide reporting and analysis. The Office of Personnel Management (OPM) plays a crucial role in coordinating these standards, ensuring they support key initiatives and policy objectives.

This harmonization is particularly important in the context of emerging technologies like Microsoft Copilot and AI, where standardized data inputs are essential for accurate and reliable results. By adhering to these standards, agencies contribute to a more cohesive and data-driven federal workforce management ecosystem, promoting transparency and accountability across the government.

Recent Updates and Changes (as of 12/09/2025)

Recent revisions to FPM Supplement 292-1 address the impact of AI tools like Microsoft Copilot on personnel data, alongside updated reporting formats.

Impact of Microsoft Copilot and AI on Personnel Data

The integration of Microsoft Copilot and broader AI technologies presents both opportunities and challenges for federal personnel data management, as outlined in recent updates to FPM Supplement 292-1. AI’s capacity to automate tasks like drafting and summarizing content necessitates careful consideration of data privacy, security, and accuracy. Agencies must ensure compliance with existing regulations while leveraging AI’s efficiency gains.

Specifically, the supplement now addresses potential biases in AI-generated outputs and the need for human oversight in personnel actions informed by AI. Data standardization becomes even more critical to ensure AI algorithms operate effectively and equitably. The evolving landscape requires continuous monitoring and adaptation of data governance policies to maintain data integrity and accountability. Furthermore, the supplement emphasizes the importance of training federal employees on responsible AI usage and data handling practices.

Changes in Data Reporting Formats

Recent revisions to FPM Supplement 292-1 (dated December 9th, 2025) detail significant updates to data reporting formats for federal agencies. These changes aim to enhance data interoperability and streamline submissions to the Office of Personnel Management (OPM). The supplement now mandates the adoption of standardized XML schemas for all personnel data transmissions, replacing older, less efficient methods.

Agencies are required to implement these new formats by [Insert Date ⎼ assume 6 months from update date], ensuring compatibility with OPM’s updated data ingestion systems. Detailed technical specifications and implementation guidance are provided within the supplement. The shift to XML facilitates automated data validation and reduces errors. Furthermore, the updated formats support more granular data reporting, enabling improved analysis and decision-making within the federal HR community.

Future Trends in Federal Personnel Data Management

Looking ahead, FPM Supplement 292-1 anticipates a significant evolution in federal personnel data management, heavily influenced by Artificial Intelligence (AI) like Microsoft Copilot. The supplement highlights the need for agencies to prepare for AI-driven data analytics, requiring enhanced data quality and standardized definitions. Expect increased emphasis on real-time data reporting and predictive analytics to proactively address workforce challenges.

Future iterations of the supplement will likely address data privacy concerns related to AI, alongside the ethical implications of algorithmic decision-making in HR. Continuous adaptation to evolving technologies and data standards will be crucial. The OPM envisions a future where personnel data is a strategic asset, enabling data-driven insights and improved workforce management across the federal government.

Categories
Manuals

honeywell 1900 barcode scanner manual

Honeywell’s Xenon 1900 series offers exceptional scanning performance, and comprehensive user manuals (available as PDF downloads) guide installation and operation;

These guides detail instructions, covering everything from initial setup to advanced programming, ensuring optimal use of this versatile scanner․

Overview of the Honeywell Xenon 1900 Series

The Honeywell Xenon 1900 series represents a family of high-performance area-imaging barcode scanners designed for a wide range of applications․ These scanners, detailed in their respective user manuals, excel in both 1D and 2D barcode reading, offering versatility for retail, healthcare, and industrial environments․

Available in corded and cordless configurations, the Xenon 1900 prioritizes speed and accuracy․ Honeywell provides comprehensive PDF documentation outlining features like its adaptive illumination and quick-scan capability․ The series is known for its durability and ease of integration, making it a popular choice for businesses seeking reliable scanning solutions․

Key Features and Benefits

The Honeywell Xenon 1900 boasts several key features, thoroughly explained in the user manual․ These include superior motion tolerance, allowing for quick and accurate scanning of moving items․ Its adaptive illumination optimizes scanning performance across various barcode types and conditions․

Benefits extend to reduced training time due to intuitive operation, and minimized downtime thanks to durable construction․ The manual details configuration options for diverse interfaces․ Furthermore, the scanner’s ability to read poor-quality or damaged barcodes enhances operational efficiency, as highlighted in Honeywell’s PDF documentation․

Getting Started with Your Scanner

Refer to the Honeywell 1900 manual for unboxing instructions and component identification․ The PDF guide ensures a smooth initial setup and familiarization process․

Unboxing and Initial Inspection

Carefully unpack your Honeywell Xenon 1900 scanner, referencing the user manual for a component checklist․ Verify the package includes the scanner itself, any accompanying cables (USB, etc․), and relevant documentation – typically a quick start guide and a comprehensive PDF manual․

Inspect all items for any signs of physical damage incurred during shipping․

Thoroughly examine the scanner for scratches, cracks, or loose parts․ If damage is present, immediately contact Honeywell support or your point of purchase․ Retain all packaging materials for potential returns or warranty claims, as detailed in the manual․

Scanner Components and Identification

The Honeywell Xenon 1900 features a scan window, trigger button, and various interface ports (USB, etc․)․ Refer to your user manual’s diagrams for precise locations․ The manual identifies the status indicator LEDs, signaling power, scanning activity, and potential errors․

Understand the function of each component before operation․

The PDF manual details the cable connections and their purpose․ Familiarize yourself with the scanner’s physical layout to ensure proper handling and efficient troubleshooting, as outlined in the comprehensive instructions․

Installation and Configuration

Honeywell’s manual provides clear instructions for connecting the scanner to your host system, including potential driver installation (if needed) and basic settings configuration․

Connecting the Scanner to a Host System

Honeywell manuals detail various connection methods for the Xenon 1900, including USB and wireless options․ The user guide emphasizes verifying cable integrity and proper port functionality before initiating the connection process․

For USB connections, simply plug the scanner into an available port on your host system․ Wireless setup involves pairing the scanner with a compatible access point, following the step-by-step instructions within the PDF manual;

The manual also notes compatibility with PDAs and Honeywell Mobility Systems devices, often utilizing barcode-based configuration for streamlined integration․

Driver Installation (if required)

The Honeywell Xenon 1900 often functions as a plug-and-play device, minimizing the need for explicit driver installation․ However, the user manual (PDF format) advises checking the Honeywell website (www․honeywellaidc․com) for the latest drivers, particularly for specialized applications or older operating systems․

If a driver is necessary, the manual provides clear instructions for downloading and installing it; It stresses the importance of following the on-screen prompts and restarting the host system after installation․

Troubleshooting sections within the manual address common driver-related issues and offer potential solutions․

Configuring Basic Scanner Settings

The Honeywell Xenon 1900 user manual details how to adjust fundamental settings․ These adjustments, often made via barcode configuration codes, include symbology enablement, controlling good read feedback (visual/audible), and setting interface options․

The manual (available as a PDF) provides a comprehensive list of these codes, explaining each setting’s function․ Users can scan these codes directly into the scanner to modify its behavior․

Instructions cover setting scan aggressiveness and defining prefix/suffix characters for data transmission․

Understanding Scanner Operation

The Honeywell 1900 manual details optimal scanning techniques, supported 1D/2D symbologies, and effective pitch angles for reliable barcode reading performance․

Scanning Techniques for Optimal Performance

Honeywell’s manual emphasizes maintaining a consistent scan distance and angle for reliable reads․ The Xenon 1900 excels with a -45 to 45-degree pitch reading angle․

Ensure proper illumination; avoid glare or excessively dark environments․ Present barcodes squarely to the scanner, and utilize a smooth, sweeping motion if necessary․

Avoid obstructions and damaged barcodes; The user guide provides detailed illustrations and troubleshooting tips for challenging scans, maximizing efficiency and minimizing errors․

Supported Barcode Symbologies (1D & 2D)

The Honeywell Xenon 1900 is a versatile area-imaging scanner, supporting a wide range of both 1D and 2D barcode symbologies․ The user manual details comprehensive compatibility․

It reliably reads standard linear (1D) barcodes and complex 2D codes like QR, DataMatrix, and PDF417․ Configuration options, outlined in the PDF guide, allow enabling or disabling specific symbologies․

This flexibility ensures seamless integration across diverse applications, from retail to healthcare, accommodating various barcode formats for efficient data capture․

Reading Pitch Angles and Scan Distance

The Honeywell Xenon 1900 boasts an impressive reading range and wide pitch angles, detailed within the user manual․ It effectively scans barcodes from close proximity to extended distances, optimizing workflow efficiency․

The scanner supports a pitch reading angle of -45 to 45 degrees, allowing for comfortable scanning without precise alignment․ The PDF guide provides specific distance recommendations for various barcode densities․

Understanding these parameters, as outlined in the documentation, ensures optimal performance and minimizes scanning errors․

Programming and Customization

Honeywell Xenon 1900 scanners are programmable via barcode configuration codes, detailed in the manual․ Customize interface options and settings for tailored performance․

Using Barcode Configuration Codes

Barcode configuration codes offer a powerful method for customizing the Honeywell Xenon 1900․ The user manual provides a complete listing of these codes, enabling adjustments to symbology settings, interface parameters, and various operational behaviors․

Scanning these specific barcode patterns directly programs the scanner, eliminating the need for software or a direct connection to a computer․ This allows for quick and efficient configuration changes in the field․ Refer to the PDF manual for detailed instructions and code explanations․

Proper use of these codes unlocks the full potential of the scanner, tailoring it to specific application requirements and optimizing performance․

Interface Options and Configuration

The Honeywell Xenon 1900 supports multiple interface options, including USB, Serial, and Wireless, offering flexibility for diverse host systems․ The user manual details configuration procedures for each interface, ensuring seamless connectivity․

Configuration often involves selecting the appropriate interface type and setting communication parameters like baud rate and data bits․ Utilizing barcode configuration codes, as outlined in the PDF guide, simplifies this process․

Proper interface configuration is crucial for reliable data transmission and optimal scanner performance within your specific environment․

Troubleshooting Common Issues

The Honeywell manual provides solutions for issues like scanning failures and connectivity problems, including detailed error message explanations and guided troubleshooting steps․

Scanner Not Reading Barcodes

If the Honeywell Xenon 1900 isn’t reading barcodes, the user manual suggests verifying the barcode type is supported, checking for damage to the barcode itself, and ensuring proper scan distance․

Additionally, confirm the scanner lens is clean and free of obstructions․ Adjusting the scan angle, as detailed in the manual, can also improve readability․

Incorrect symbology configuration or low barcode print quality are common causes; the manual provides instructions for configuration adjustments and troubleshooting these issues․

Connectivity Problems

The Honeywell Xenon 1900 manual addresses connectivity issues by first recommending a check of the cable connection to both the scanner and the host system․ Ensure the cable is securely fastened at both ends․

If using a USB interface, try a different USB port․ The manual also details interface configuration options, including RS-232 and USB HID, and provides instructions for setting the correct communication parameters․

Driver issues, though often auto-configured, may require re-installation as outlined in the manual․

Error Messages and Their Meanings

The Honeywell Xenon 1900 manual dedicates a section to decoding error messages, crucial for troubleshooting․ Common messages indicate issues like “No Decode,” suggesting poor barcode quality or incorrect scan technique, as detailed in the instructions․

Other messages may relate to communication errors, prompting a review of cable connections and interface settings․ The manual provides a comprehensive list, explaining each code and offering suggested resolutions․

Referencing this section is vital for efficient problem-solving, avoiding unnecessary service calls․

Maintenance and Care

The Honeywell 1900 manual emphasizes regular cleaning with a soft cloth to maintain performance․ Preventative tips ensure longevity and reliable scanning operation․

Cleaning the Scanner

Regular cleaning is crucial for maintaining the Honeywell Xenon 1900’s optimal performance, as detailed in the user manual․ Use a soft, lint-free cloth, lightly dampened with water or isopropyl alcohol, to wipe the scanner’s exterior surfaces․

Avoid abrasive cleaners or solvents, as these can damage the plastic components or the scan window․ Pay particular attention to the scan window, ensuring it is free from dust, dirt, and smudges․

For stubborn residue, gently wipe the window with a circular motion․ Always ensure the scanner is disconnected from any power source before cleaning․ Proper care extends the scanner’s lifespan and ensures accurate readings․

Preventative Maintenance Tips

To ensure long-term reliability of your Honeywell Xenon 1900, follow these preventative maintenance tips outlined in the user manual․ Regularly inspect the cable for any signs of damage, such as fraying or cracking, and replace if necessary․

Avoid exposing the scanner to extreme temperatures, humidity, or direct sunlight․ Store the scanner in a clean, dry environment when not in use․

Periodically check and clean the scan window as described in the cleaning section․ Following these simple steps will minimize downtime and maintain peak scanning performance․

Technical Specifications

Honeywell provides detailed specifications in the manual, including physical characteristics like dimensions and weight, alongside performance data such as reading range and symbologies․

Physical Characteristics

Honeywell Xenon 1900 scanners, as detailed in the user manual, exhibit varied physical dimensions depending on the specific model (corded or cordless)․ Generally, they are designed for comfortable, ergonomic handling during prolonged use․

The manual specifies weight ranges, typically falling between 147 to 172 grams, contributing to a balanced feel; Robust construction ensures durability, withstanding typical drops and impacts․ The scanner’s housing material is designed for resistance to common cleaning agents, as outlined in the maintenance section of the PDF guide․

Performance Specifications

The Honeywell Xenon 1900, according to the user manual, boasts impressive scanning capabilities․ It supports a wide range of 1D and 2D barcode symbologies, ensuring versatility․ Pitch reading angles range from -45 to 45 degrees, enhancing scan success․

The PDF guide details scan distances, varying by barcode density․ Motion tolerance is high, enabling quick scanning of moving items․ The scanner utilizes an area-imaging sensor for reliable performance, even with damaged or poorly printed barcodes, as demonstrated in the manual’s testing procedures․

Resources and Support

Honeywell provides extensive support, including downloadable user manuals in PDF format, and a dedicated support website at www․honeywellaidc․com for assistance․

Downloading the User Manual (PDF)

Accessing the Honeywell Xenon 1900 barcode scanner’s user manual in PDF format is straightforward․ Numerous online resources host the document, ensuring easy access for all users․

A quick web search for “Honeywell Xenon 1900 user manual PDF” will yield direct download links․

These manuals comprehensively cover installation, operation, troubleshooting, and programming, offering detailed instructions․

Ensure you download the manual specific to your scanner’s configuration for accurate guidance․ The PDF format allows for convenient viewing and printing, facilitating easy reference during setup and maintenance․

Honeywell Support Website

Honeywell’s official support website, www․honeywellaidc․com, serves as a central hub for all 1900 series scanner resources․ Here, you’ll find a wealth of information, including downloadable user manuals in PDF format, frequently asked questions, and troubleshooting guides․

The website also offers access to software updates, configuration tools, and detailed technical specifications․

Users can submit support requests directly through the site, connecting with Honeywell’s expert technical team for personalized assistance․ This ensures comprehensive support throughout the scanner’s lifecycle․

Warranty Information

Honeywell provides coverage details for the Xenon 1900, outlined in the product documentation․ Contact Honeywell directly for warranty claims and support․

Coverage Details

Honeywell International Inc․ reserves the right to modify specifications and information contained within documentation, including warranty details for the Xenon 1900 series․ The standard warranty typically covers defects in materials and workmanship for a specified period from the date of purchase․

This coverage doesn’t extend to damage resulting from misuse, accidents, or unauthorized modifications․ Refer to the complete warranty statement included with your scanner or downloadable from the Honeywell support website for precise terms, conditions, and limitations․ Proper registration may be required to validate your warranty․

Contacting Honeywell for Warranty Claims

To initiate a warranty claim for your Honeywell Xenon 1900 barcode scanner, first visit the official Honeywell support website (www․honeywellaidc․com) for detailed instructions and claim forms․ You may need your proof of purchase and scanner serial number․

Alternatively, contact Honeywell’s customer service directly via phone or email, details of which are available on their website․ Ensure you clearly describe the issue and provide all requested documentation to expedite the process․ Retain all shipping documentation for returned units․

Categories
Manuals

kidde 900-cuar manual

Kidde 900-CUDR Manual: A Comprehensive Guide

This guide details the Kidde 900-CUDR combination alarm, offering crucial safety information. It covers installation, testing, maintenance, and troubleshooting, ensuring optimal performance.

Understanding the Kidde 900-CUDR Alarm

The Kidde 900-CUDR is a vital safety device, a combination photoelectric smoke and carbon monoxide (CO) alarm designed to provide early warning of both fire hazards and the presence of this odorless, colorless gas. This alarm isn’t just a detector; it’s a crucial component of a comprehensive home safety plan, protecting you and your family around the clock.

Unlike ionization smoke sensors, the photoelectric technology used in the 900-CUDR is particularly effective at detecting smoldering fires, which often produce larger smoke particles. Simultaneously, the integrated CO alarm continuously monitors carbon monoxide levels, alerting you to potentially dangerous concentrations. The alarm’s user guide, as referenced, details its functions and proper operation.

Understanding its capabilities – smoke and carbon monoxide detection – is paramount. Regular testing, as outlined in the manual, ensures the alarm is functioning correctly. It’s important to remember this device is a warning system, and appropriate action must be taken upon activation, such as evacuating the premises and contacting emergency services.

Key Features and Benefits

The Kidde 900-CUDR boasts several key features enhancing home safety. Its dual-sensor technology – photoelectric smoke and electrochemical carbon monoxide – offers comprehensive protection against both fire and CO poisoning. A prominent test button allows for easy and regular functionality checks, ensuring peace of mind.

This alarm features a hush feature, temporarily silencing nuisance alarms caused by cooking or steam, preventing unnecessary disruptions. An 85-decibel siren provides a loud, clear warning signal, audible throughout the home, even for those with impaired hearing. The alarm also includes a low-battery warning, alerting you when replacement is needed.

Beyond these features, the 900-CUDR offers significant benefits. Early detection of smoke and CO can save lives. Its combined functionality eliminates the need for separate smoke and CO detectors, simplifying home safety. The alarm’s reliable performance, backed by Kidde’s reputation, provides lasting protection and reassurance for you and your family.

Alarm Functions: Smoke & Carbon Monoxide Detection

The Kidde 900-CUDR utilizes photoelectric sensing for smoke detection, making it particularly effective at detecting smoldering fires – those without flames – which often produce more smoke than heat. This technology is less prone to false alarms from cooking. For carbon monoxide (CO) detection, the alarm employs an electrochemical sensor, accurately measuring CO levels in the air.

When smoke is detected, the alarm sounds a distinct temporal pattern – three long beeps followed by a pause – alerting occupants to a potential fire. CO detection triggers a different alarm pattern: four long beeps followed by a pause. These differing signals help differentiate between smoke and CO emergencies.

The alarm continuously monitors both smoke and CO levels. It’s crucial to understand that CO is a colorless, odorless gas, making detection reliant on a functioning alarm. Regular testing ensures the sensors are operating correctly, providing reliable protection against both threats. The alarm doesn’t eliminate the source of the danger, but provides critical early warning.

Installation Requirements & Guidelines

Proper installation of the Kidde 900-CUDR is vital for optimal performance. The alarm should be mounted on a ceiling or high on a wall, adhering to local codes and regulations. Avoid installing in dusty, dirty, or insect-infested areas, as these can interfere with sensor accuracy.

Do not install near air vents, kitchens, bathrooms (due to steam), or garages (exhaust fumes). These locations can cause false alarms or sensor damage. The alarm requires a stable power source; ensure the wiring (if hardwired) is correctly connected and meets electrical standards. If battery-powered, use only the specified battery type.

For interconnected systems, follow the wiring diagram carefully. Incorrect wiring can disable the entire system. Always test the alarm after installation to confirm functionality. Consider multiple alarms for larger homes or those with multiple levels, ensuring coverage throughout the living space. Secure mounting prevents accidental dislodgement, maintaining continuous protection.

Mounting Location Best Practices

Selecting the right mounting location for your Kidde 900-CUDR alarm is crucial for effective detection. Ideally, install on a ceiling at least 4 inches from any wall or corner to ensure optimal airflow around the sensor. Wall mounting should be between 4 and 12 inches from the ceiling.

Avoid areas with obstructed airflow, such as alcoves or directly beneath sloped ceilings. In bedrooms, position the alarm as close to the sleeping area as possible. For multi-story homes, install an alarm on each level, including the basement. Consider hallways outside of sleeping areas for broader coverage.

Do not mount in kitchens, bathrooms, or garages due to potential false alarms from cooking fumes, steam, or exhaust. Keep alarms away from windows and doors that may cause drafts. Regularly inspect mounting locations to ensure they remain free from obstructions and that the alarm is securely attached. Proper placement maximizes responsiveness and minimizes nuisance alarms.

Wiring Instructions (if applicable)

The Kidde 900-CUDR alarm can be hardwired into a 120V AC, 60Hz power source, offering continuous protection. Important: Disconnect power at the circuit breaker before beginning any wiring. The alarm features terminals for AC power, battery backup, and interconnection with other compatible alarms.

Neutral wire (white) connects to the neutral terminal. Hot wire (black) connects to the hot terminal. Ensure a secure connection, avoiding loose wires. Interconnection wiring allows multiple alarms to activate simultaneously; use 18-gauge or larger wire for interconnection.

Always follow local electrical codes and regulations. If unsure about wiring, consult a qualified electrician. After wiring, restore power at the breaker. The alarm should power on and initiate a self-test. Verify proper operation by pressing the test button. Incorrect wiring can damage the alarm and create a safety hazard. Proper grounding is essential for safe operation.

Battery Installation & Replacement

The Kidde 900-CUDR utilizes a 9V battery as a backup power source, ensuring continued operation during power outages. To install, open the battery compartment, typically located on the back or side of the alarm. Align the battery terminals correctly – positive (+) to positive and negative (-) to negative. Snap the battery securely into place.

The alarm will chirp to indicate a low battery condition. Replace the battery immediately upon hearing this chirp. Use only a fresh, high-quality 9V alkaline battery. Avoid mixing old and new batteries. During battery replacement, briefly disconnect the AC power to reset the alarm’s memory.

Important: A depleted battery does not necessarily indicate a malfunction of the alarm itself. Regular battery checks (at least twice a year) are recommended. Dispose of used batteries properly, following local regulations. A functioning battery provides vital protection when AC power is unavailable.

Testing the Alarm Regularly

Regular testing is crucial to ensure your Kidde 900-CUDR alarm functions correctly. At a minimum, test the alarm weekly. Locate the test button, usually prominently displayed on the alarm’s face. Press and hold the test button for several seconds. The alarm should emit a loud, piercing sound – both a smoke and carbon monoxide alarm tone should be heard;

If the alarm doesn’t sound, or the sound is weak, immediately investigate. Check the battery (see ‘Battery Installation & Replacement’) and ensure the alarm is properly connected to AC power. Do not disable the alarm if it fails to test; address the issue promptly.

Important: Testing only verifies the electronic circuitry and horn. It doesn’t confirm the alarm’s ability to detect smoke or carbon monoxide. Familiarize yourself with the alarm’s sound patterns for both hazards. Consistent testing provides peace of mind and confirms your continued safety.

Understanding Alarm Signals: Smoke Detection

When the Kidde 900-CUDR detects smoke, it emits a series of four loud beeps, repeated continuously. This distinct pattern signifies a potential fire. The alarm’s photoelectric sensor is designed to detect smoldering fires, which often produce larger smoke particles. However, it can also respond to fast-flaming fires.

Upon hearing the smoke alarm signal, immediately investigate the source. If a fire is confirmed, evacuate all occupants and call emergency services. Do not attempt to extinguish a large fire yourself. Even if the source appears minor, treat every alarm as a genuine emergency until proven otherwise.

False alarms can occur due to cooking fumes, steam, or dust. Utilize the ‘Hush’ feature (see ‘Hush Feature Operation’) to temporarily silence nuisance alarms. However, never disconnect the alarm or remove the battery, as this compromises your safety. Always address the cause of the alarm, even if it seems minor.

Understanding Alarm Signals: Carbon Monoxide Detection

The Kidde 900-CUDR utilizes a different alarm pattern for carbon monoxide (CO) detection: a series of four beeps, followed by a pause, repeated continuously. This distinct signal differentiates CO alarms from smoke alarms, allowing for a quicker, more appropriate response. CO is a colorless, odorless gas, making detection reliant on this alarm.

If the CO alarm sounds, immediately assume a dangerous CO presence. Evacuate everyone from the premises to fresh air. Do not re-enter until emergency services (fire department or gas company) have investigated and cleared the area. CO poisoning can be fatal, even at low levels.

Symptoms of CO poisoning include headache, dizziness, weakness, nausea, vomiting, chest pain, and confusion. If anyone exhibits these symptoms, seek immediate medical attention. Ensure proper ventilation when using fuel-burning appliances. Never use a generator indoors or in an enclosed space.

Troubleshooting Common Issues

Nuisance Alarms: Frequent false alarms can stem from humidity, dust, or insects. Ensure proper ventilation and regularly clean the alarm (see ‘Alarm Maintenance & Cleaning’). Avoid placing near cooking areas or bathrooms. If issues persist, try relocating the unit.

Low Battery Chirp: A short, intermittent chirp indicates a low battery. Replace the battery immediately with a fresh one (see ‘Battery Installation & Replacement’). Do not ignore this signal, as it compromises alarm functionality.

Alarm Doesn’t Test: If the test button doesn’t activate the alarm, first replace the battery. If the problem continues, the alarm may be faulty and require replacement. Do not attempt to repair the unit yourself.

Hush Feature Inoperative: Verify the source of the alarm. The hush feature only silences smoke alarms, not CO alarms. Ensure the alarm isn’t detecting a real fire before using the hush function.

Hush Feature Operation

The Kidde 900-CUDR features a “Hush” button designed to temporarily silence nuisance smoke alarms. This is particularly useful for reducing alerts triggered by cooking smoke or steam. Pressing the Hush button will silence the alarm for approximately 8-10 minutes.

Important Considerations: The Hush feature only functions for smoke alarms; it will not silence carbon monoxide detections. Always investigate the cause of the alarm before using the Hush button. If the alarm reactivates shortly after being hushed, it indicates a potentially serious situation requiring immediate attention.

Activation Process: Locate the Hush button on the alarm’s face. A single press will initiate the temporary silencing period. The alarm will still detect and alert you to genuine fire hazards during this time, but will suppress minor, non-threatening triggers. Never disable the alarm permanently.

Alarm Maintenance & Cleaning

Regular maintenance is crucial for ensuring the Kidde 900-CUDR’s reliable operation. Dust, dirt, and insects can interfere with the alarm’s sensors, leading to false alarms or reduced sensitivity. Clean the alarm at least every six months, or more frequently in dusty environments.

Cleaning Procedure: Begin by disconnecting the alarm from the power source (battery or hardwired connection). Use a soft cloth or a vacuum cleaner with a brush attachment to gently remove dust and debris from the exterior. Do not use water, cleaning solvents, or detergents. These can damage the electronic components.

Internal Cleaning: Avoid disassembling the alarm for internal cleaning. If significant debris is present inside, consider replacing the unit. Regularly testing the alarm (see section on testing) is also a vital maintenance step. A clean alarm is a functioning alarm, providing essential protection for your home and family.

Alarm Lifespan & Replacement

The Kidde 900-CUDR combination smoke and carbon monoxide alarm has a limited lifespan of 7-10 years. This is due to the gradual degradation of the sensor’s sensitivity over time. Even with regular maintenance and testing, the alarm’s ability to accurately detect threats diminishes with age.

Replacement is essential to maintain optimal safety. Locate the manufacture date on the back of the alarm. After 7-10 years from that date, the unit should be replaced, even if it appears to be functioning correctly. Do not attempt to repair or restore an aging alarm.

Proper disposal of the old alarm is also important. Check with your local waste management authorities for guidelines on disposing of electronic devices. Replacing your alarm proactively ensures continued protection against the dangers of smoke and carbon monoxide, safeguarding your home and loved ones.

Safety Precautions & Warnings

This Kidde 900-CUDR alarm is a vital safety device, but it’s not a substitute for caution. Always practice fire and carbon monoxide safety measures, including regular appliance checks and proper ventilation.

Never disable the alarm to silence nuisance alarms caused by cooking or steam. Instead, utilize the hush feature (described elsewhere in this manual). Disabling the alarm compromises your safety. Do not ignore any alarm signal. Treat every alarm as a potential emergency and investigate immediately.

This alarm may not operate correctly if it’s exposed to extreme temperatures or humidity. Keep it away from sources of interference, such as fans or vents. Regular testing is crucial to ensure functionality. This device is designed to alert, not prevent, fires or carbon monoxide poisoning. Always have a well-defined escape plan and practice it regularly with your family.

Regulatory Compliance Information

The Kidde 900-CUDR alarm is designed and manufactured to meet or exceed stringent safety standards. It complies with Underwriters Laboratories (UL) standards for both smoke detection and carbon monoxide sensing, ensuring reliable performance and accuracy.

This device adheres to relevant federal and state regulations concerning fire safety and carbon monoxide alarm requirements. It is intended for residential use only and should not be utilized in commercial or industrial settings unless specifically approved by local authorities.

The alarm’s performance is subject to regular quality control checks during the manufacturing process. Any modifications or alterations to the device may void its compliance certifications and potentially compromise its functionality. Refer to the product packaging and accompanying documentation for specific certification details and compliance statements. Proper disposal of the alarm is essential; follow local regulations for electronic waste recycling.

Where to Find Additional Support & Resources

For comprehensive support regarding your Kidde 900-CUDR alarm, several resources are readily available. Kidde’s official website (www.kidde.com) provides a wealth of information, including frequently asked questions, downloadable manuals, and troubleshooting guides. You can also access safety tips and educational materials related to fire and carbon monoxide prevention.

Direct customer service is accessible via phone at 1-800-880-6788. Their knowledgeable representatives can assist with technical inquiries, warranty claims, and product registration. Online support is also offered through a dedicated contact form on the Kidde website, allowing for detailed issue descriptions and documentation submission.

Furthermore, numerous online forums and communities dedicated to home safety and security often feature discussions about Kidde alarms. Reviewing these platforms can provide valuable insights from other users. Remember to always prioritize official Kidde resources for accurate and reliable information.